
Falcon GT-HO Phase III Project : fit-out
 Falcon GT-HO Phase III Project
 Falcon GT-HO Phase III Project

 Falcon GT-HO Phase III Project
 Falcon GT-HO Phase III Project
 Falcon GT-HO Phase III Project
 Falcon GT-HO Phase III Project

 Falcon GT-HO Phase III Project

 Falcon GT-HO Phase III Project

 Falcon GT-HO Phase III Project

 Falcon GT-HO Phase III Project

 Falcon GT-HO Phase III Project

 Falcon GT-HO Phase III Project

 Falcon GT-HO Phase III Project

 Falcon GT-HO Phase III Project

 Falcon GT-HO Phase III Project

 Falcon GT-HO Phase III Project
 Falcon GT-HO Phase III Project
 Falcon GT-HO Phase III Project

 Falcon GT-HO Phase III Project
 Falcon GT-HO Phase III Project

 Falcon GT-HO Phase III Project

|
|
|
Falcon GT-HO Phase III Project
|
|
|
|
Falcon GT-HO Phase III Project
|
|
|
|
Falcon GT-HO Phase III Project
|
|
|
|
Falcon GT-HO Phase III Project
|
|
|
|
Falcon GT-HO Phase III Project
|
|
|
|
Falcon GT-HO Phase III Project
|
|
|
|
Falcon GT-HO Phase III Project
|
|
|
|
Falcon GT-HO Phase III Project
|
|
|
|
Falcon GT-HO Phase III Project
|
|
|
|
Falcon GT-HO Phase III Project
|
|
|
|
Falcon GT-HO Phase III Project
|
|
|
|
Falcon GT-HO Phase III Project
|
|
|
|
Falcon GT-HO Phase III Project
|
|
|
|
Falcon GT-HO Phase III Project
|
|
|
|
Falcon GT-HO Phase III Project
|
|
|
|
Falcon GT-HO Phase III Project
|
|
|
|
Falcon GT-HO Phase III Project
|
|
|
|
Falcon GT-HO Phase III Project
|
|
|
|
Falcon GT-HO Phase III Project
|
|
|
|
Falcon GT-HO Phase III Project
|
|
|
|
Falcon GT-HO Phase III Project
|
Now to put it all back together again
|
|
Project Falcon GT-HO: fit-out
|
Falcon GT-HO Phase III Project : fit-out
HOME STRAIGHT
Project HO is almost complete, as we tackle the myriad detail jobs required before it hits the road
Anyone who’s undertaken a serious car build will know this stage – where you look like you’re almost finished – is potentially the most frustrating. In our case we had an absolutely stunning body sitting up on fresh wheels and suspension, plus a brand new 400-plus horsepower engine sitting in another corner of the shed.
We were so close to finishing we could almost taste it. Or so we thought. But this is the time when you suddenly realise there is an appalling list of ‘little’ jobs to complete. Like putting in the seats, dash, mats and interior. Or all the bits that make the engine actually work, like ignition and air filter, oh, and a fuel tank would be handy. Then there’s the question of finishing off the distinctive bodywork, with stripes, spoilers and the like.
Unique Cars staffer and project manager Phil Walker is almost literally over the moon with the results so far. "As a bloke who’s knocked around with cars and been involved with resto work for many years, the professionalism and willingness of Neil and his crew has been outstanding.
"They’ve really gone way beyond what any normal human being would expect and the results are stunning."
PHOTOS:
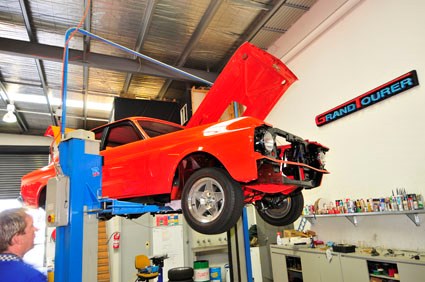
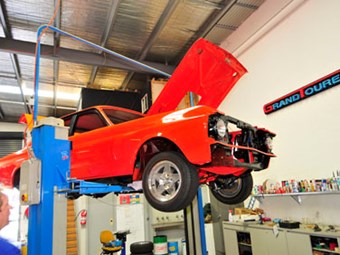
1. Looking good. It’s got suspension, brakes and the correct mags with fresh rubber from Stuckey Tyres. Now we’ve just got to add some details, like an engine, gearbox and interior! By now we’ve probably spend the most serious lumps of money, but there are still a lot of hours involved in bringing the whole jigsaw puzzle together. Neil from Grand Tourer surveys the task ahead.
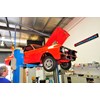
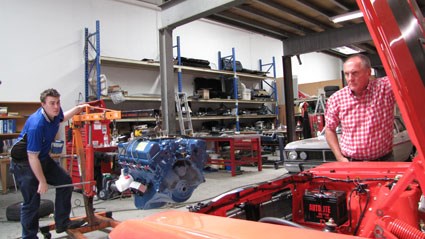
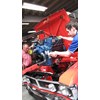
2. With our fresh 400-plus horsepower engine hanging from a hoist, Chris from Grand Tourer and UC staffer Phil Walker wait for Daniel (who has made the project his ‘baby’) to join in the fun. This is a three-person job and needs a lot of care if we’re to avoid banging about that lovely body.
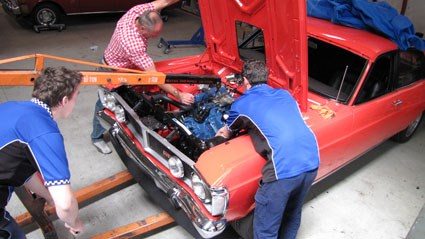
3. Now we’ve reached the critical point: getting the powerplant lined up before we lower it into the bay. Even then, it was lowered just a centimetre at a time. This task alone took several goes and a lot of patience before the crew was happy and could guarantee they still had all 30 of their digits still in place…
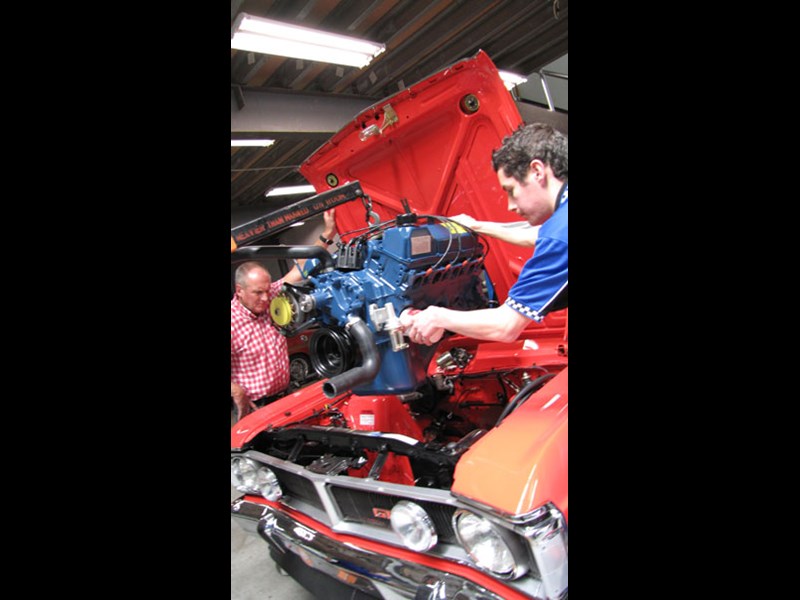
4. Just a last few tweaks before the engine mounts are hooked up. Note that by this stage we’ve already got much of the front trim fitted, such as grille, spoiler and lights. Sometimes it’s a case of fitting what you can while you’re waiting for other components.
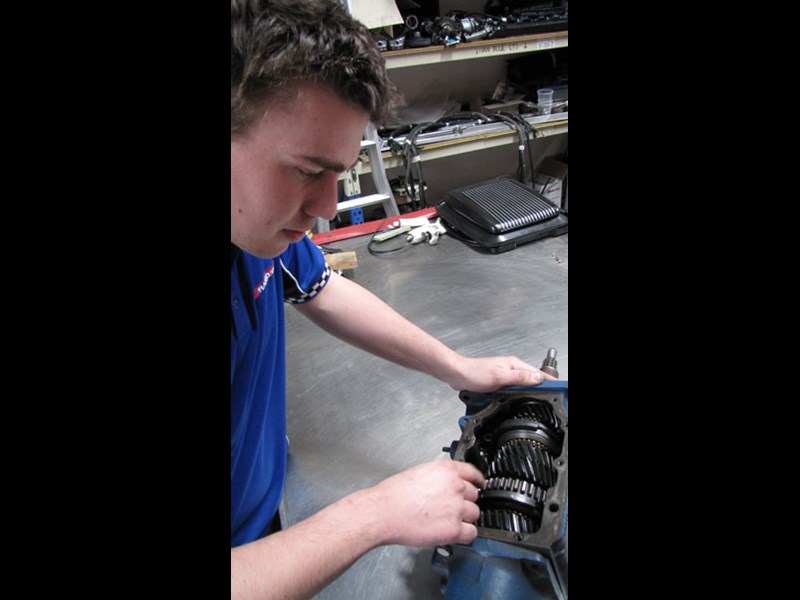
5. Chris from Grand Tourer gives the gearbox a final check before closing it up. Fresh clusters went in to the close-ratio top-loader, which has a reputation for being a super tough unit.
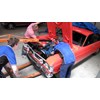
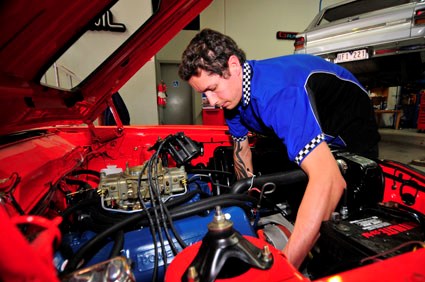
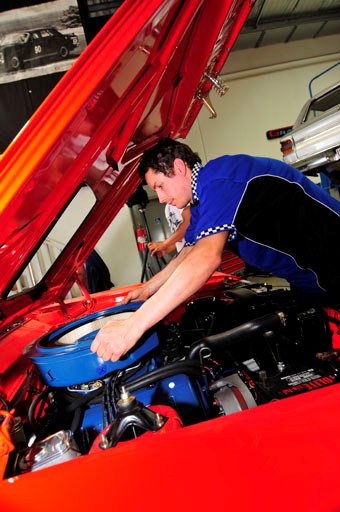
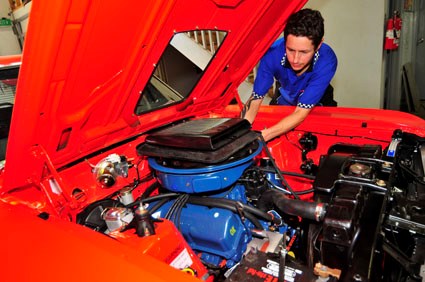
6. While the engine has done a dyno run, there’s still quite a bit to finish off when it comes to getting it into street trim. Here you can see the fresh Holley double-pumper carburettor is in place, while Daniel sorts out some of the routing for assorted cables and lines. The aim is to have an engine bay that looks like it is ex-factory.
7. Now we’re on the home stretch with the distributor coming together. The crew at Grand Tourer will be able to get the tuning close from scratch, but expect to put aside a fair bit of time for fine adjustment. The aim is to get maximum drive-ability, as they reckon the horsepower will take care of itself.
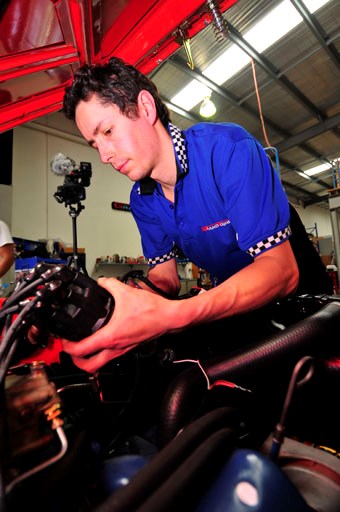
8. Daniel drops in the giant air filter housing. With the ‘shaker’ cover, it’s a very substantial component, so it’s important to make sure it’s tied down properly. A loose item could end up doing a world of damage.
9. Now we’re pretty close to having a functional engine room. A close look reveals all sorts of little warning and ‘ok’ stickers scattered about the place, lending that air of originality. This may seem pedantic, but the reward is the gasp you get when someone opens the hood and is confronted with what they would have seen in the showroom all those years ago.
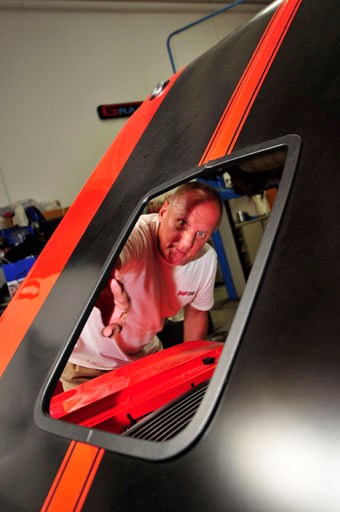
10. Hello there! Phil checks out the bonnet hole for the shaker. That panel alone has been responsible for soaking up hours of workshop time, from cutting through to painting, trimming and finally ensuring it’s properly aligned with the air scoop.
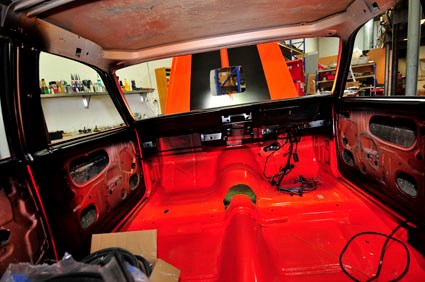
11. Here’s our before shot of the interior – all nicely painted and sealed to ensure it remains rust free, but a long, long way from being fit for human habitation. The interior can be a trap for young players, because it can easily end up costing a lot more than you expect to finish off. Trim items on older Aussie can fetch some big prices, if they’re rare and difficult to remake.
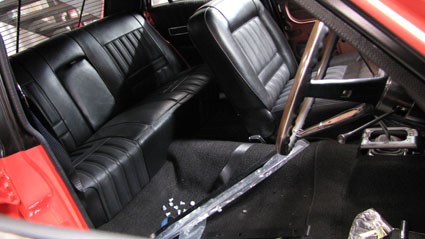
12. A real blast from the past – fresh seats. Past experience has proved to us that it’s worthwhile to completely re-pad and upholster rather than just fit new covers over tired seats.
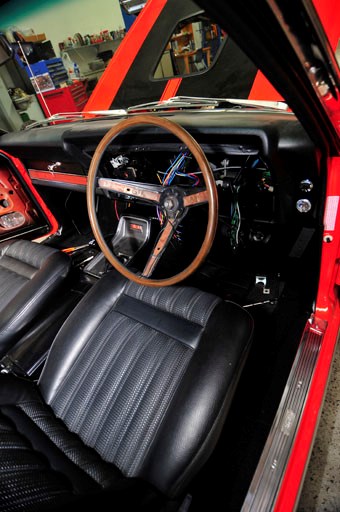
13. Early Ford steering wheels like these becoming valuable, so it’s worth looking after them. There’s still a lot of labour involved at this stage. Repro wiring looms are readily available through Classic Wiring Looms (in Melbourne) and patience is essential when working in this area to ensure you don’t end up with pinched or misplaced leads that could prove to be a hazard later on.
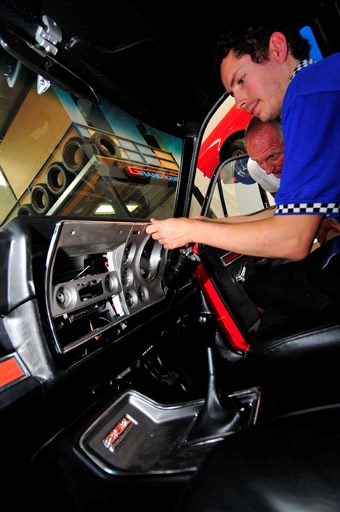
14. Our lovely centre console with the 351 badge is in, as is the shifter and boot. Now Daniel carefully slots the dash framework into place, checking for a good fit before he starts installing the instrumentation. For the driver, this will be the part of the car they stare at every time they get in, so it’s worth getting right. Can you imagine driving your pride and joy with a skewed set of clocks?
15. "Caution: do not lower windows at speeds in excess of 100mph". Okay, so it’s only a sticker, but little touches like this add hugely to the appeal of the car. And what happens if you do open the windows?
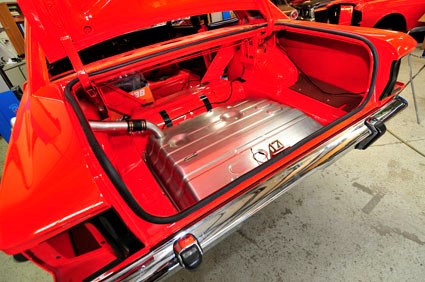
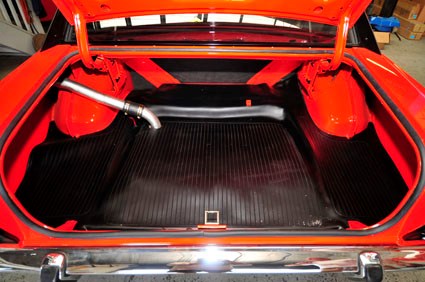
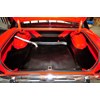
16. Do you see what we mean about facing heaps of detail to finish off? The boot, of course, has the endurance tank fitted, which will cost the proud owner the best part of $200 to fill! Meanwhile the rear bumper is on board, with the over-riders carefully placed so they’re in exactly the right position.
17. Without businesses like Grand Tourer and Rare Spares, these sorts of jobs would be a nightmare. Here we’ve managed to source new mats to the original pattern, along with a boot seal.
18. It looks very tame and basic compared to the modern race equivalents, but this rear spoiler was wild stuff in its day. Getting this and equally agricultural front spoiler on board is what helps to make the HO’s hairy-chested character.
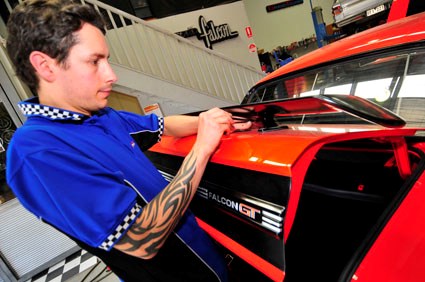
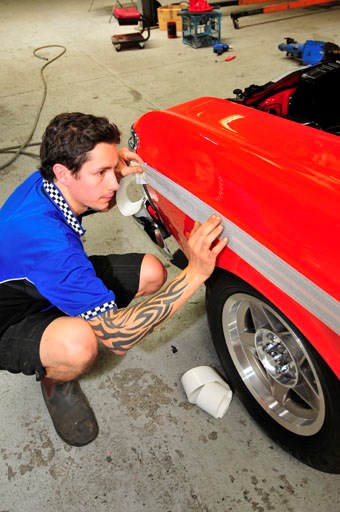
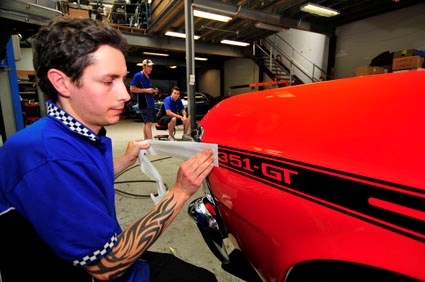
19. This is one of those jobs you really want to get it right the first time – after all, the GT stripes run the whole length of the car. Daniel makes it look dead easy, but the truth is you need a good eye, lots of patience and a steady hand to avoid it looking like an expensive lizard track
20. Here’s the magic moment that should be in every HO-builder’s family album, when the final trim is unveiled. Is there a car equivalent to baptising? If so, this is it.
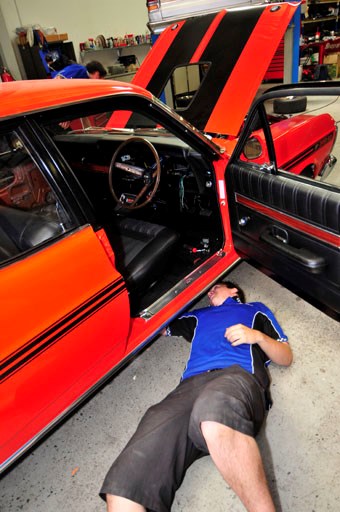
21. We’re looking good, but it’s tempting to forget the little things that you don’t see from the outside, like making sure your cables and lines are fixed in place underneath the toy. The truth is this car is proving to be better than an original when it comes to detail and quality of build. Next time you see it, we’ll be out for a drive, enjoying the fruits of all that hard work…
Rare Spares tips
Top Tips: Finishing the build
1. Don’t rush this section – otherwise you could end up undoing much of your good work.
2. Good research will help ensure that the finishing touches are right for your model car – such as, what stickers was it supposed to have and where?
3. Get organised early. Go from front to back and make a list of the components you need – update it regularly.
4. Some parts may be difficult and slow to source, so it’s worth identifying them as soon as possible so they don’t hold up the rest of the work.
5. Doing a quality job first time really pays off in the long run. Cheap ‘temporary’ fixes have a nasty habit of becoming long-term and let down the rest of the car.
Unique Cars magazine Value Guides
Sell your car for free right here
.jpg)
Get your monthly fix of news, reviews and stories on the greatest cars and minds in the automotive world.
Subscribe


.jpg)

