1968 VW Beetle body work - Our Shed
 The body with the repaired areas almost ready for paint. Look closely and you can see where I added stitch welds to reinforce and toughen the body

|
|
|
The body with the repaired areas almost ready for paint. Look closely and you can see where I added stitch welds to reinforce and toughen the body
|
After buying a bargain Bug, Glenn Torrens gets busy on its body
I’ve owned a few VW Bugs over the years. My first was a 1956 oval-window model that I rebuilt/restored and modified while I was at university. Since then, there have been a couple more daily/street Bugs, a couple of race/track Bugs, a couple of Karmann Beetle Cabriolet restorations, my mate Tony’s outback charity trek/off-road Baja Bug and a Kombi pop-top camper restoration (that I didn’t quite complete). There has also been a handful of other mates’ cars that I’ve spent many weekends tinkering with, often while drinking beer.
All good fun!
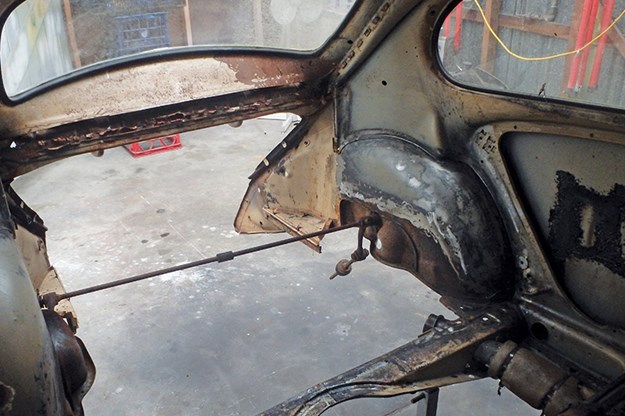
This panel arches over the VW’s gearbox and supports the rear seat. My rusty one was replaced with one sourced from a dead Bug
With experience comes confidence, so after all this mucking around with VWs, and with a few spare parts in my garage, I was confident I would have my $750 1968 bargain-buy brown ‘bitsa’ Bug back on the road quickly and easily, without breaking the bank.
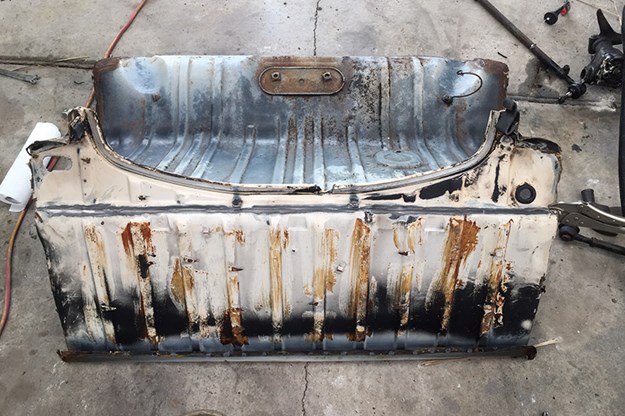
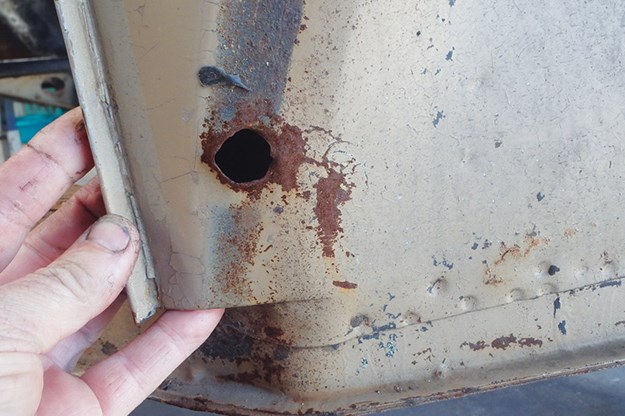
There’s not much other than rust holding this Bug together
There was rust inside the front wheel arches – a common Bug rust area – but a repair was easy using little more than scrap metal and a welder. A leaky rear windscreen had caused some rust behind the back seat, too. For a neat repair, I decided to replace this entire body-section. To an untrained eye, replacing the pelvis of a body looks to be an enormous task, but drilling out a few dozen spot welds and replacing this panel with one donated from a wrecked car is a relatively easy, tidy and strong repair that really doesn’t take much time.
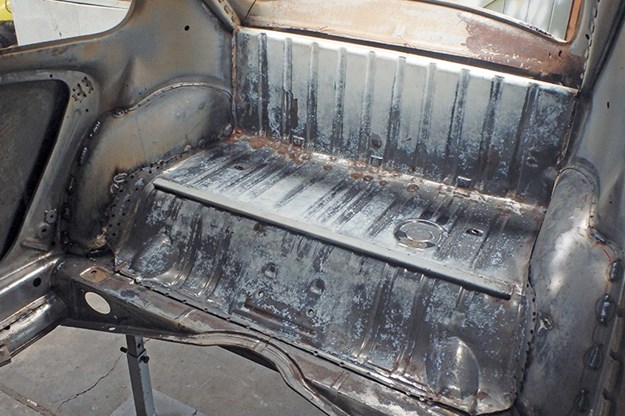
By drilling out the spotwelds, my VW’s rusty rear seat panel was removed and the replacement carefully fitted
Bug mudguard bolts often seize, tearing the threaded mounts from the body. That had occurred on mine so while I had the welder fired-up, I installed spares I’d sourced from another dead Bug.
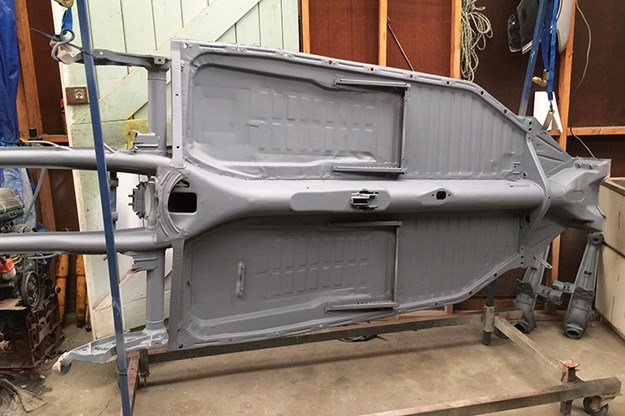
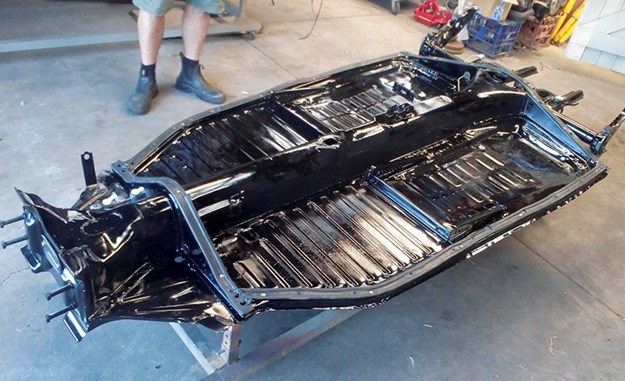
Primed and painted floor pan (above and below)
With these repairs complete, I stitch-welded the body, motorsport-style. Stitch-welds – so named as the gapped welds on the body seams resemble clothing stitches – help to stiffen and toughen the body beyond what the factory spot welds provide. I put this extra work into the body to lay the foundation for the possibility of this Bug, in future, being prepped for weekend motorsport or outback charity treks, as well as my intention of building a fun street cruiser. It wasn’t too difficult to ‘do a lap’ of all the body’s spot-welded seams to reinforce them before fresh seam sealer and paint was laid down.
Of course, there is more to any car than just its body and even though I already had many of the parts required, I began searching for other components such as a new windscreen, interior trim and tail lights. Chasing the parts and having them on-hand makes assembling the car quick, easy and fun.
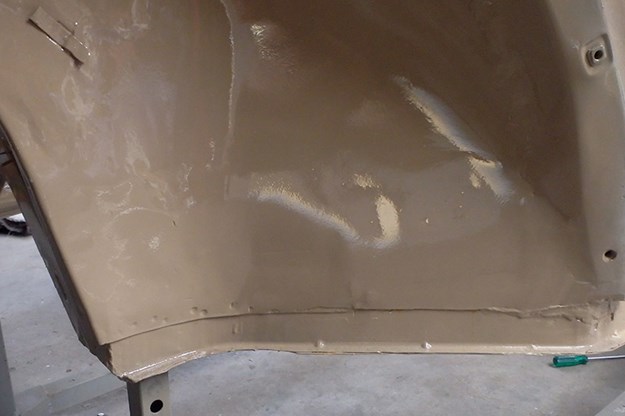
Old panels are an excellent source of steel for repairs. I used this discarded engine lid section to repair the Bug’s inner guards
With the rust repaired, I prepped and painted the body’s interior and underside. When my Bug resurrection is completed, I reckon the as-new inside will sparkle against the car’s 50-years-of-history outside.

This is the well-known high-riding, small wheeled, air-conditioned model
Battered and bruised but not totally broken
From Unique Cars #456, Aug 2021
Unique Cars magazine Value Guides
Sell your car for free right here
.jpg)
Get your monthly fix of news, reviews and stories on the greatest cars and minds in the automotive world.
Subscribe