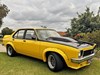
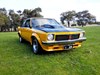
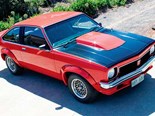
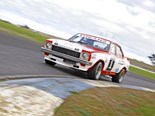
1977 Holden Torana Hatch - Reader Resto


|
|
|
|
|
|
|
|
|
|
Craig's '77 Holden Torana hatch started out as a $1600 shed-find and ended up as one very sweet drive
1977 Holden Torana Hatch Resto
This is one of those cars that has spent a lot of its life sitting in sheds. The couple in Euroa who had it before me had it ‘resting’ for six years and I did pretty much the same with it until 2015 when I decided to have a go at it.
It cost just $1600 but that’s all they were worth back then and, as it turned out, it needed a lot of work. After digging it out from under the bicycles and other gear, I went over it to see what it needed. A fair bit as it turned out.
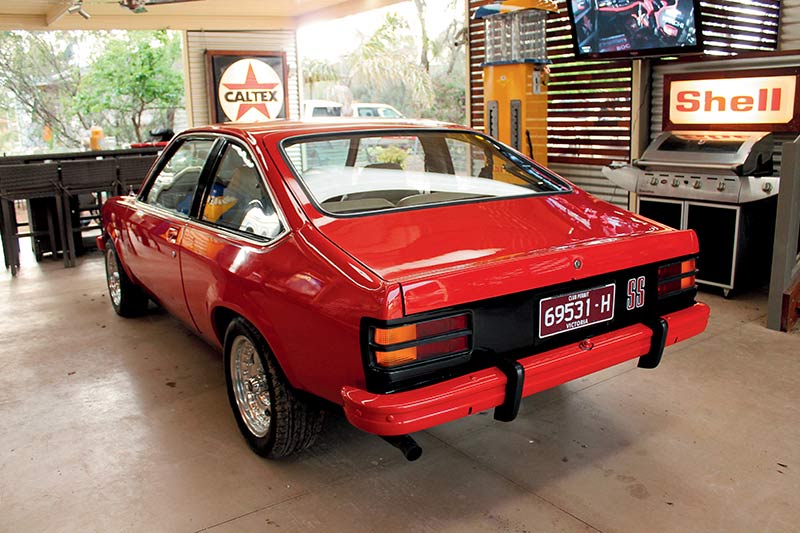
The good news was the body was a good one. Around the rear hatch is the biggest problem area, but they can also cop rust in the tail lights, floors and doors, sometimes the sills and the plenum. Really, they can rust anywhere, but the hatch is the worst.
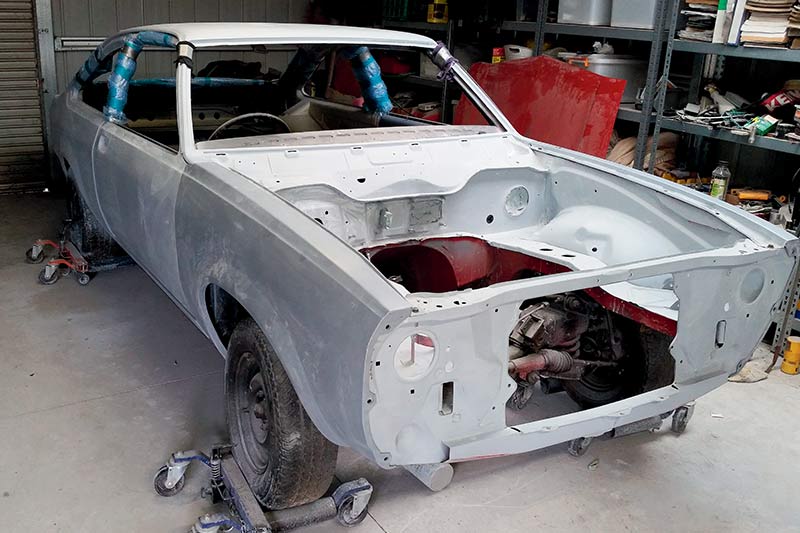
By far the biggest problem I had was the roof, which had been jumped on by a couple of kids. I got myself a shrink gun (which works a little like a spot-welder) and then patiently went through the process of a quick blast of heat in the affected area, let it cool down and repeat. It takes a long time but you just keep plodding away.
I’m a fitter and turner by trade and so am able to tackle a lot of the work. For the hatch, I made up some new sections and welded them in. I also had a bloke come in during the day and do a lot of the rubbing down, then I’d get on to the next task when I got home at night.
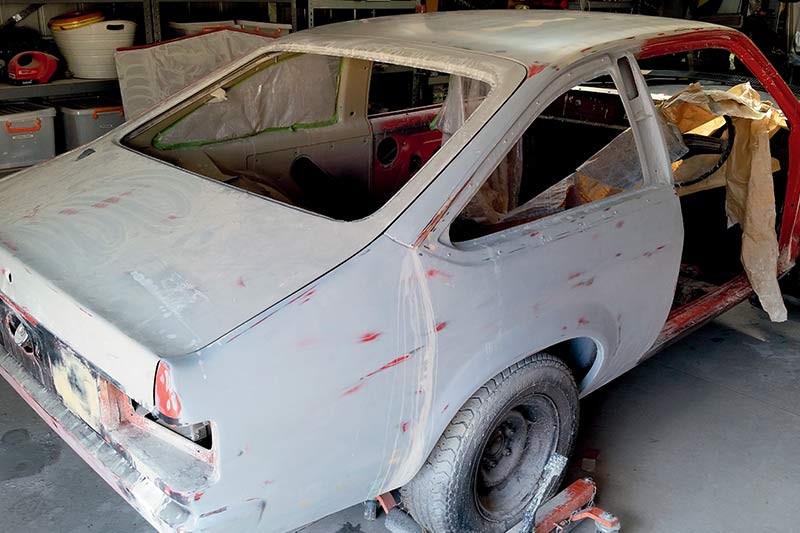
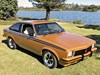
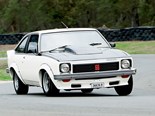
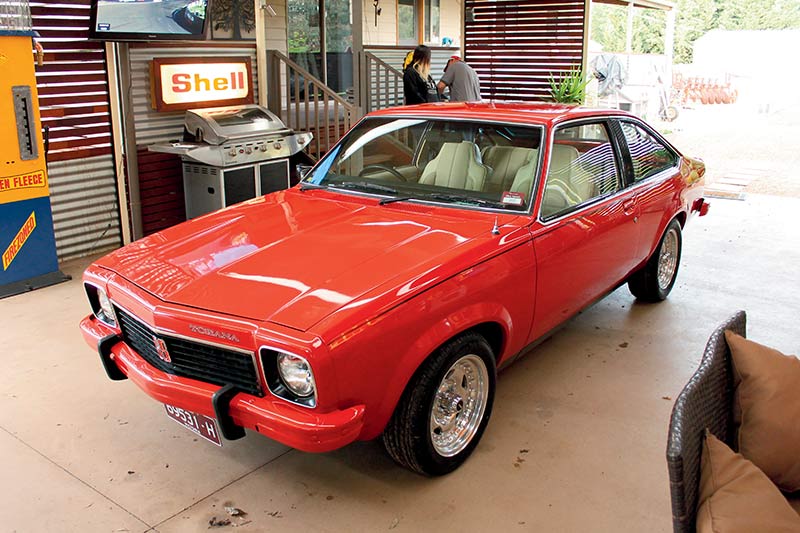
Because I was working to a limited budget, it was important to do as much of the body prep as possible myself, before sending it off for paint – one of the few things I’m not really equipped to do. That’s hugely time-consuming, but worth the effort. A couple of folk called Shaun Powell and Antonio Famularo applied the colour for me. I’d decided to dress the car up as an SS because I like the look, though the mechanicals were to be a different story. We stuck with Flamenco Red for the colour.
Back from the paint shop, it was time to rub it down again to get the right finish. We were pretty close when the car was photographed, though I think it needs a little more finishing off.
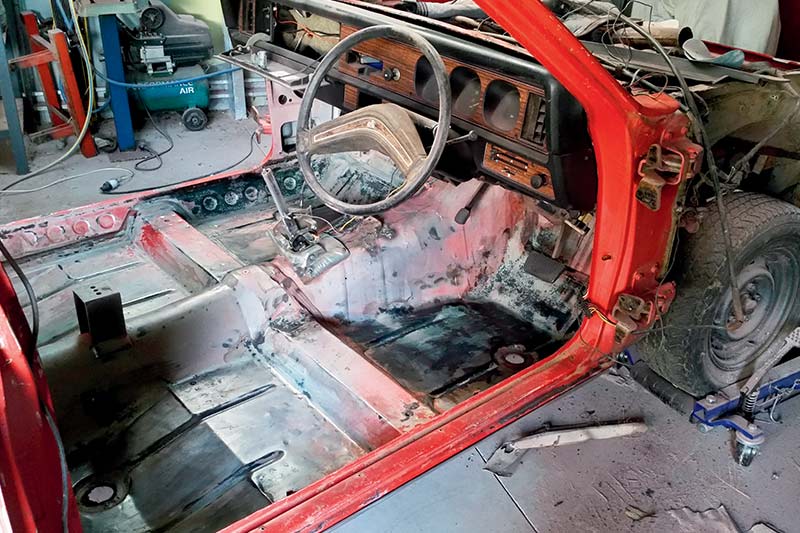
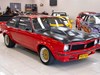
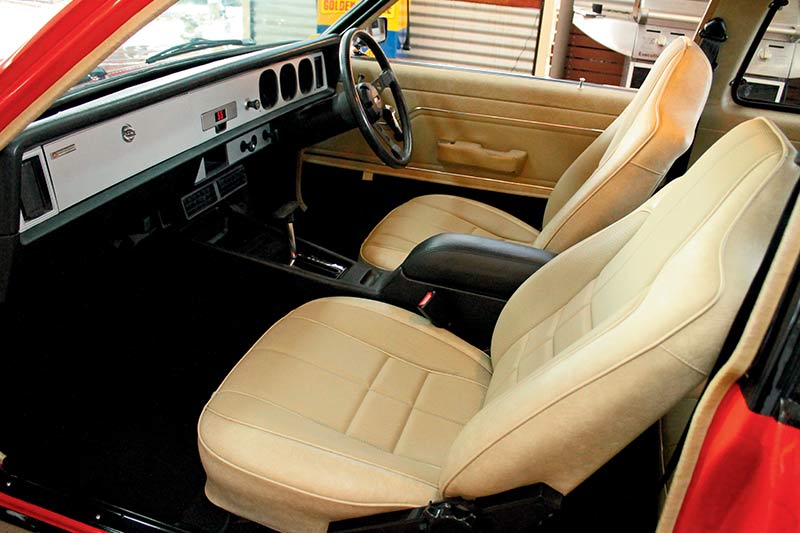
We decided to give the interior a complete refit – at least when it came to roof lining, soft panels and seats. A mob called Tony Alltrim supplied most of the pieces, including door cards, which I got fitted up by Sunshine Trimmers. One of my daughters made the SS cushion in the rear!
This car started life as an SL, and so has the standard dash. It does the job, though we did manage to source an SS steering wheel to jazz up the interior a little.
When it came to mechanicals, the original engine and transmission were stuffed. In the end I bought a VK wagon with an EFI 202 and Trimatic as a donor car. The machining was done by Seymour Engines, while I tackled the assembly and finish. It was a bit frustrating to discover the EFI wouldn’t quite clear the bonnet, so I fitted a Weber carburettor from a 4.1 Falcon as an interim measure.
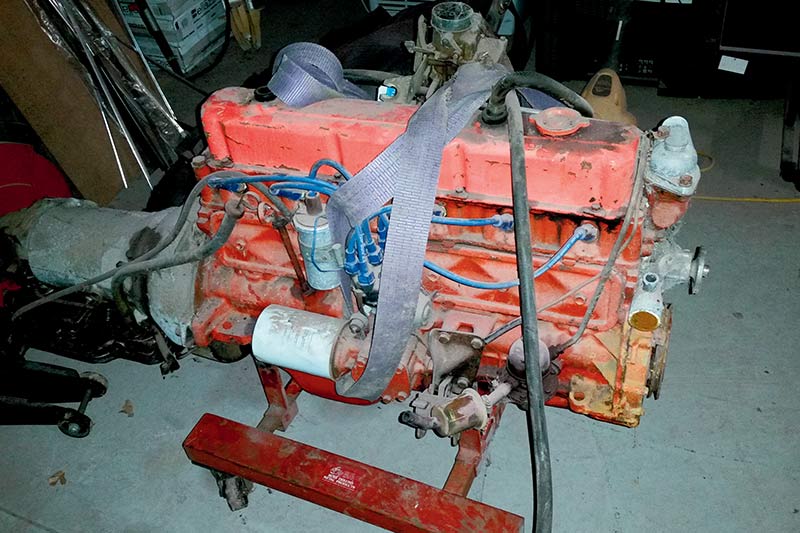
What I plan to do is make up a new manifold out of two existing ones so the EFI can go in. It’s also running the VK distributor and coil.
Why fit the 202? My original plan was to drop in a V8. But I won Project HQ from Unique Cars a while ago and realised that I really didn’t need another V8 in the shed – with three there already!
So I decided to do this one up for the daughters and the wife and put a 202 in it. There’s nothing wrong with a 202 – it’s a beautiful car to drive, really nice. Light on the steering – there’s no power steering, or other accessories. The daughters can handle it very easy.
The Trimatic came out of the VK, which doesn’t make any difference physically except you have to pull the gear selector apart and reverse the levers – the selector is on the driver side in the Torana and passenger side in the VK. That was a bit of a surprise.
I spent more time on it doing the hidden bits, to make it nice. So I did a lot under the bonnet – instead of having it nice on the outside and open the bonnet and it’s horrible, same under the hatch, around the doors and so-on.
Braking is standard, with drums rear and front discs. I did a complete rebuild, including making up new lines. In fact I made up new lines for all the systems in the car, in part to get it looking right and also so I could be sure there wouldn’t be any problems. Wheels are from VPW – something that’s not too expensive to dress up the car a little.
Last on my list are some new headlight trims and one or two other pieces. I’m just waiting for them to turn up.
My advice for anyone tackling a restoration: first, keep going on the job. This took 50 weeks to complete. Second, watch the money side of things, as it’s really easy to blow the budget. I initially aimed to spend $14,000, but it ended up more like $18,000. Even so, I’m pretty happy.
The car drives well and the daughters love it, so it’s ended well.
THE RESTORATION
Hatch Rust
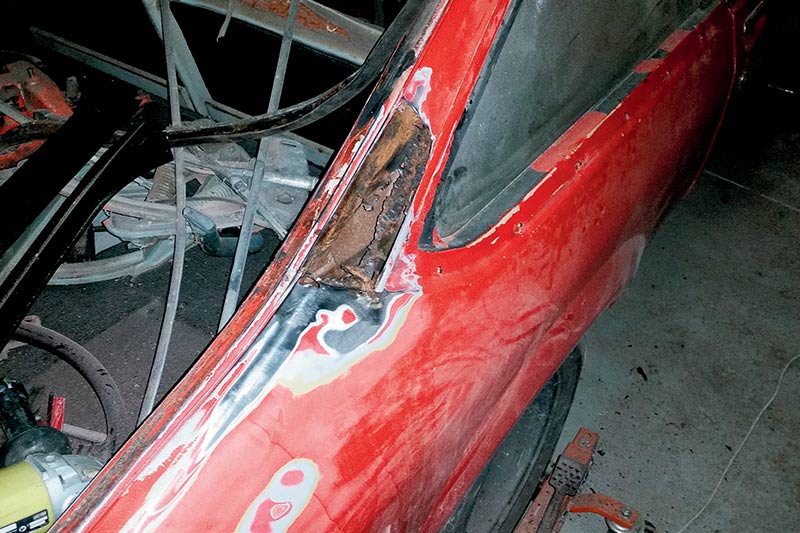
This is the big rust trap in these cars. New inserts were welded in.
Floors
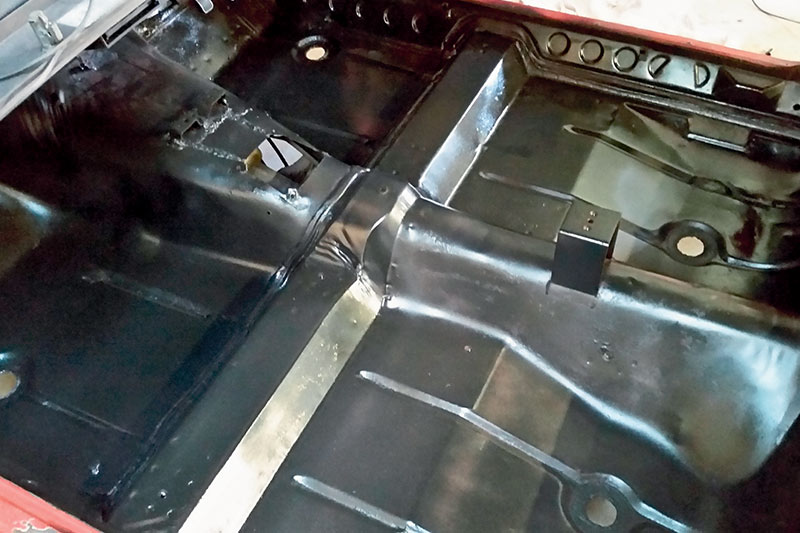
Though the floors were solid, Craig decided to finish them properly.
Paint
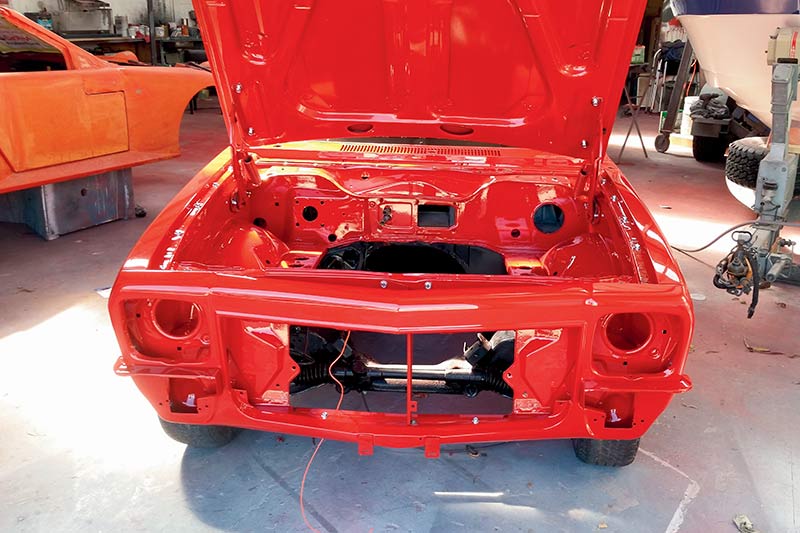
Paint bills were kept down by doing the most of the prep at home.
Trim
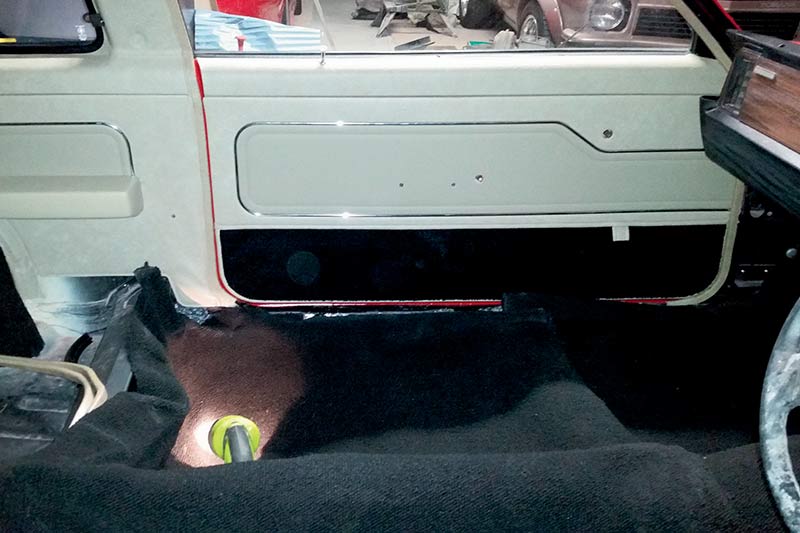
The interior ended up swallowing a fair bit of the budget.
Fresh Grunt
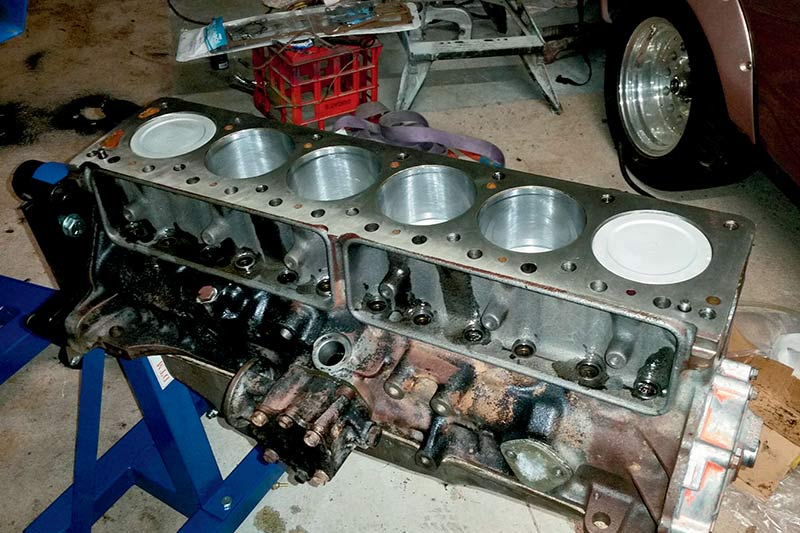
The engine might have slotted straight in, but got a freshen-up anyway.
Bits & Pieces
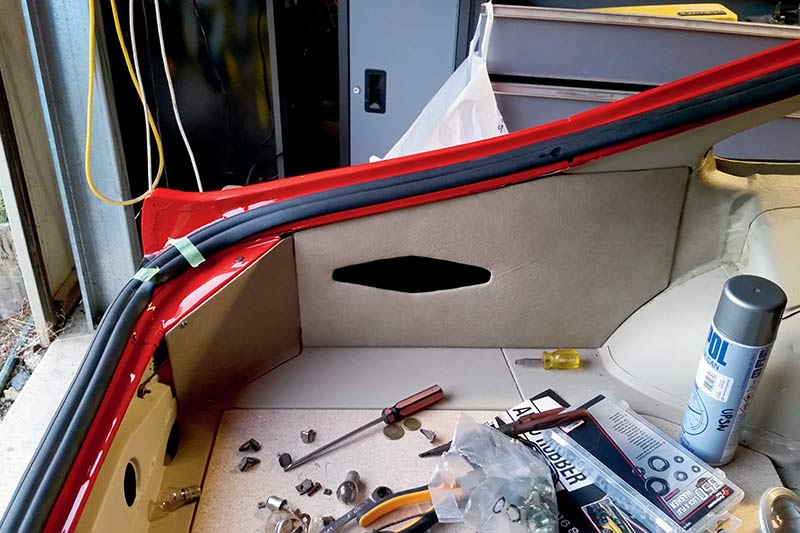
Refitting the rear was time-consuming. Note the nice new hatch seals.
Length of restoration: 50 weeks.
Unique Cars magazine Value Guides
Sell your car for free right here
.jpg)
Get your monthly fix of news, reviews and stories on the greatest cars and minds in the automotive world.
Subscribe