Roaring Forties: Ford GT40 Tribute - part 2
 Roaring Forties: GT40 Tribute

 Roaring Forties: GT40 Tribute

 Roaring Forties: GT40 Tribute

 Roaring Forties: GT40 Tribute

 Roaring Forties: GT40 Tribute

 Roaring Forties: GT40 Tribute

 Roaring Forties: GT40 Tribute

 Roaring Forties: GT40 Tribute

 Roaring Forties: GT40 Tribute

 Roaring Forties: GT40 Tribute

 Roaring Forties: GT40 Tribute

 Roaring Forties: GT40 Tribute

|
|
|
Roaring Forties: GT40 Tribute
|
|
|
|
Roaring Forties: GT40 Tribute
|
|
|
|
Roaring Forties: GT40 Tribute
|
|
|
|
Roaring Forties: GT40 Tribute
|
|
|
|
Roaring Forties: GT40 Tribute
|
|
|
|
Roaring Forties: GT40 Tribute
|
|
|
|
Roaring Forties: GT40 Tribute
|
|
|
|
Roaring Forties: GT40 Tribute
|
|
|
|
Roaring Forties: GT40 Tribute
|
|
|
|
Roaring Forties: GT40 Tribute
|
|
|
|
Roaring Forties: GT40 Tribute
|
|
|
|
Roaring Forties: GT40 Tribute
|
|
|
|
|
Stage two of building a Ford GT40 tribute car

|
|
Roaring Forties: GT40 Tribute
|
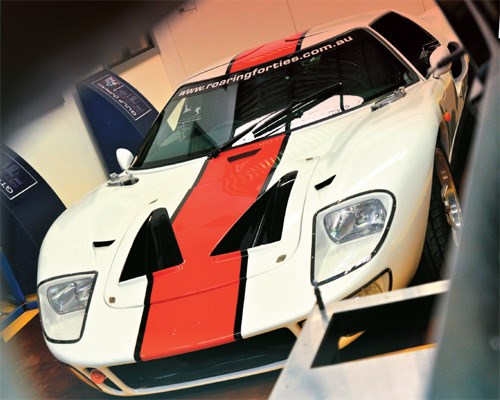
Ford GT40 Tribute
DIY SUPERCAR
A couple of months ago we headed down the road of building a GT40 tribute car (read here) - now we tackle stage two...
It’s one of those ideas that seems to lodge in your skull – at first seeming utterly impossible, and then, slowly, becomes a live project. Building your own supercar, that is. The folk at Roaring Forties in Melbourne, a long-term supplier of DIY GT40s, are familiar with the syndrome.
Adrian Sorensen, the Operations Manager, says it can take several years for people to go from that first nagging thought to the reality of having a bare chassis sitting in their shed. From there, it’s a matter of following the ten-step program the company has put together.
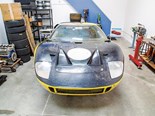
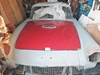
In issue 354, we covered the very first stage of building this circa $130,000 car. That involved fitting the panelling to the steel chassis cage.
You might think that adding panels so early on is a bit like putting the cart before the horse(s). But the parts we’re talking about here are critical chassis panels including firewall and floor panel sections. Before you start dressing up the bare steel spaceframe it’s worth thinking seriously about getting it powder-coated at this stage.
The panels in question are all laser-cut aluminium items. They’re already cut and drilled, but some will require a little bending. And you’ll need to drill holes in the frame. It’s a big help that the kit includes a complete set of Cleco pins to fit and hold panel pieces accurately in place while you complete the attachment exercise.
Just about the only key decision you will have made up to this point is whether you are going with a centre-mounted or side-mounted gearshift, as this alters what you do with the panelling. Adrian, for example, has opted for a centre-shift and is relocating the handbrake to the right-hand side.
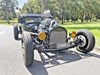
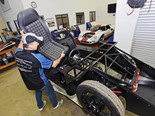
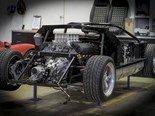
Stage two is a relatively simple one, which is turning the panelled cage into something that vaguely resembles a rolling car. In other words, turning it into a rolling chassis.
Perhaps the only big decision here is whether to go for the standard road control arms, or get the track version. The first has a rose joint at one end and nolethane bushes at the other. "So where the arms bolt on to the suspension upright," explains Adrian, "they’re always rose joints – however the race control arms have left-hand thread rose joints, where they bolt to the chassis…so where you have left and right-hand threads, you have infinite adjustability, so you can really key it in, where with the standard system you have half-turn increments." He says there is no noticeable difference in ride quality.
However, he also warns there can be a big difference in maintenance and running costs if you end up doing some track time with the car. "If the car’s going to see any track time, I would put the rose joints in," he says. "Because one track day will severely reduce the life of the nolethane bushes. It’s not the cost so much as the process of changing them. While it’s a bare chassis, it’s easy to offer up the track arms." In fact, changing worn bushes is a big job and, for the extra $1500 at the build stage, it makes a whole lot more sense to fit the premium gear. It seems like one of those expenses that will be completely forgotten by the time you’re ready to actually drive your new toy.
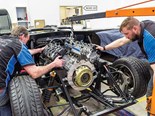
The suspension uprights are fitted at this point and are standard, regardless of the tune and set-up of your final product. "They’re our own design," says Adrian, "cast aluminium, heat-treated and machined. The front-suspension geometry was devised with John Bowe – there were three final options, and we decided on one a couple of years ago. It’s the front that does all the work."
Rear uprights are a carry-over from earlier cars.
Tempting though it might be to add shockers at this stage, Adrian warns against it. These project builds can literally take years. "Depending on the build time-frame, you avoid buying anything with rubber seals – so no suspension yet. We offer dummy stays, or you can make your own, so you can put the car on wheels. The shocks are among the last things to go in."
However brakes do go on at this stage, but we’re a little way from hooking them up. Roaring Forties used to have three or four packages, made up of a mix of heritages and requiring special machining. "But now we’ve streamlined it," says Adrian. "We use DVA rotors and AP Racing calipers. There are two sizes, big (four-piston) and ridiculously big (six-piston) – V-eight supercar style.
"The car brakes unbelievably, even on the smaller package." Keep in mind that a finished machine only weighs around 1150kg, and it’s sitting on big rubber, so pulling it up really isn’t an issue.
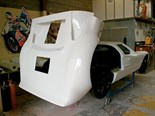
We’re not yet thinking about the final wheels. "You don’t want tyres going hard," explains Adrian, "So we offer a set of thin shop wheels so you can move it around. This also means that when you take it to a paint shop, you’re not risking overspray on your beautiful road wheels.
"The car is now capable of being taken off jack stands and being put on the ground – it’s a big visual milestone to see it on wheels. Particularly if you’ve been dreaming of this for years – to stand back with a beer and say to your mate, ‘Look at that, I built that’."
The next stage (next issue) is to work out the ergonomics. This is where you need to site the steering wheel, seat, shifter, handbrake and pedal box. Plus, we’ll be tackling a few other items, such as hydraulics. We’ll see you back in the shed…
ROAD AND TRACK?
The good folk at Roaring Forties reckon it’s absolutely crucial that you think about what you want to do with the car, before you begin the build. For example, a lot of track time will influence a whole range of decisions along the way, not least of which is you’ll need additional headroom to accommodate a helmet.
Pretty much any use and any owner can be sorted out. Adrian cites the case of a WA customer who is very tall, and requested a 40mm drop floor instead of 25mm to increase
his headroom.
"We can help clients do the measuring," he says. "Tall people can be long in the leg or torso and that can be quite critical. There are other work-arounds, such as seat-mounting or even
a Gurney bubble."
Unique Cars magazine Value Guides
Sell your car for free right here
.jpg)
Get your monthly fix of news, reviews and stories on the greatest cars and minds in the automotive world.
Subscribe


.JPG)


.jpg)