Fitting aftermarket seats to an early Ford Mustang
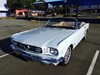
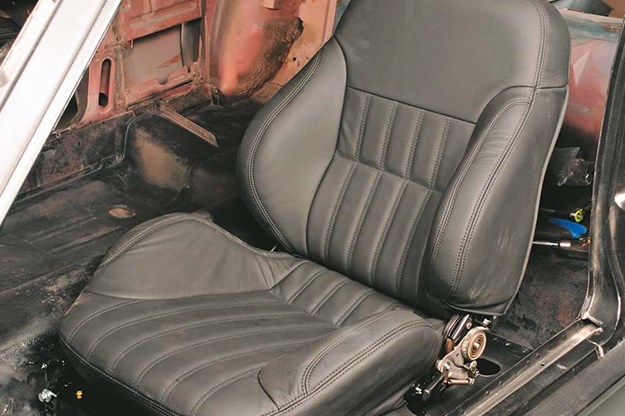
 Classy conversion. Procar Rally Smoothbacks greatly improve comfort and are way more supportive in corners

|
|
|
Classy conversion. Procar Rally Smoothbacks greatly improve comfort and are way more supportive in corners
|
Take a seat as we show you how to transform your Pony's saddle
While the debate rages about the retention of original equipment versus making sensible upgrades, one thing is certain – interior comfort can be greatly improved via the fitment of aftermarket seats.
From Unique Cars issue 320, Jan/Feb 2011
In this case we are looking at Procar Rally Smoothbacks, available for classic Mustangs in the U.S. The seats don’t look out of place and you’ll emerge much less fatigued after a long trip on these compared with the factory original seats.
| Read next: Recaro unveils retro-inspired 'classic line' seats
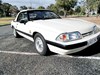
Leo Banks, who did the work here, is a big guy at well over 183cm tall and has trouble fitting into Mustangs but even smaller guys can find some of the aptly named Pony cars a bit tight.
| Read next: 1976 Kingswood interior retrim
To create more leg and headroom and generally improve comfort for himself and his customers, Leo simply lowers the seat supports and moves them rearwards. The lower the seat, the more room gained, but there’s a limit and the seat boxes form part of the side intrusion resistance – so they have to maintain their basic configuration. About 25mm can be taken out of the height.
Let’s see how it’s done, as Leo takes us step-by-step through the process.
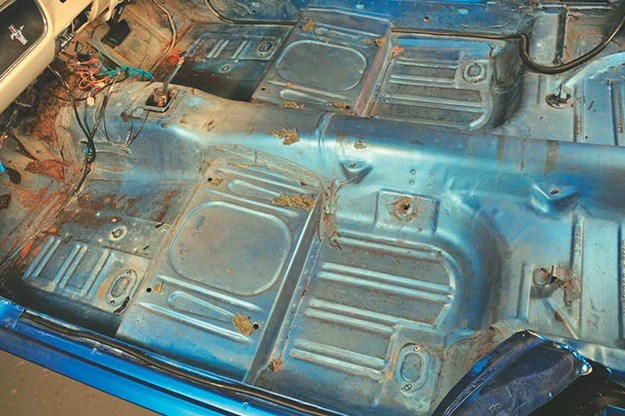
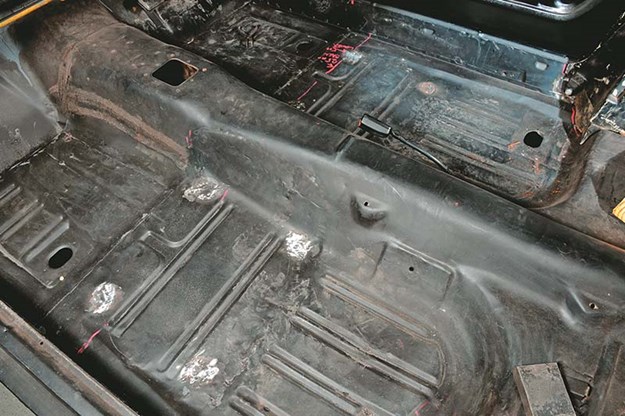
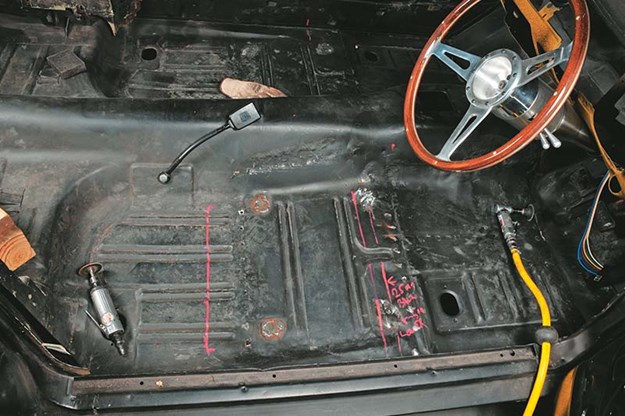
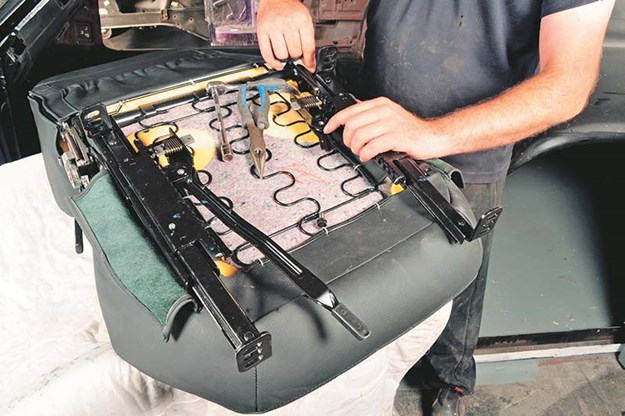
1. Standard interior of a stripped-out Mustang. The seat boxes have to be removed, altered, and refitted in a better position.
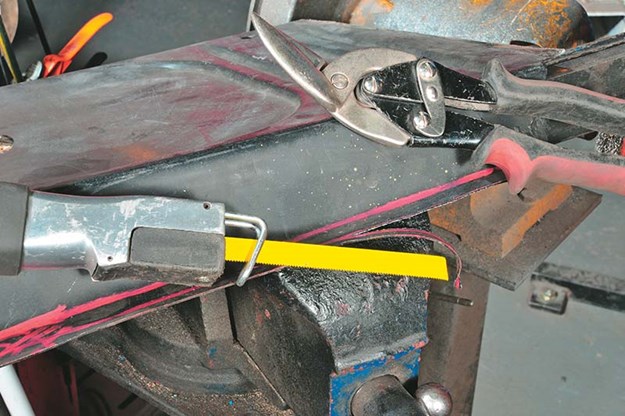
2. The seats will be set about 25mm lower than standard. Leo makes the fold line that defines the inside of the new flange.
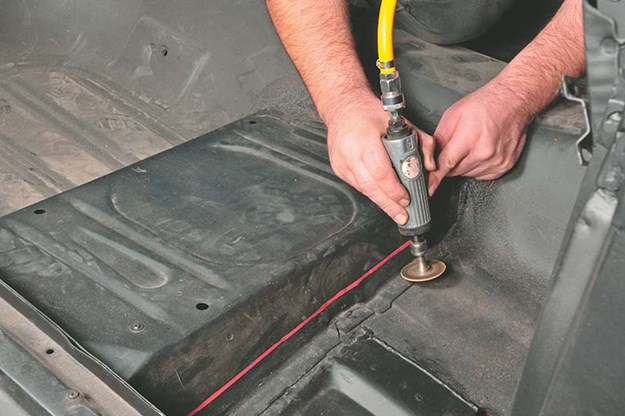
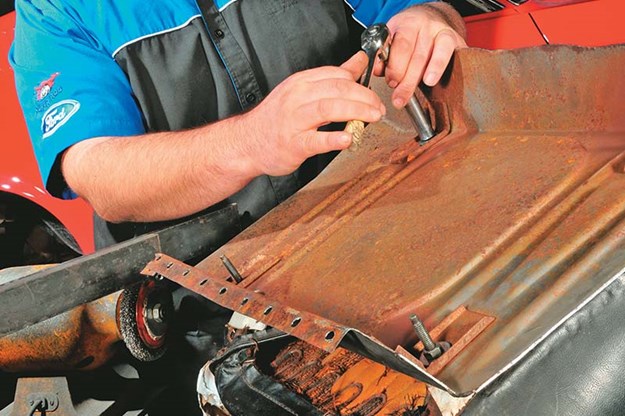
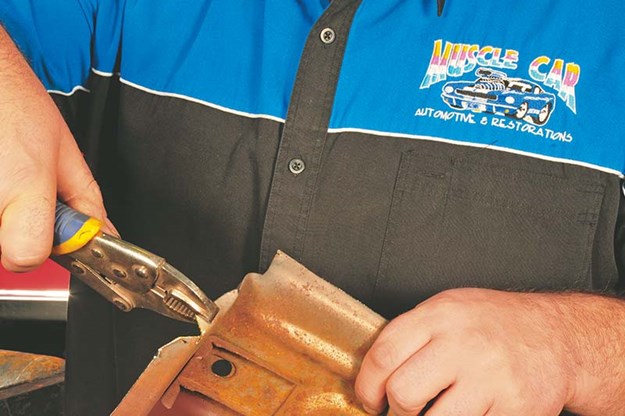
3. Seat boxes are removed by grinding away the factory spot welds until the flanges are freed.
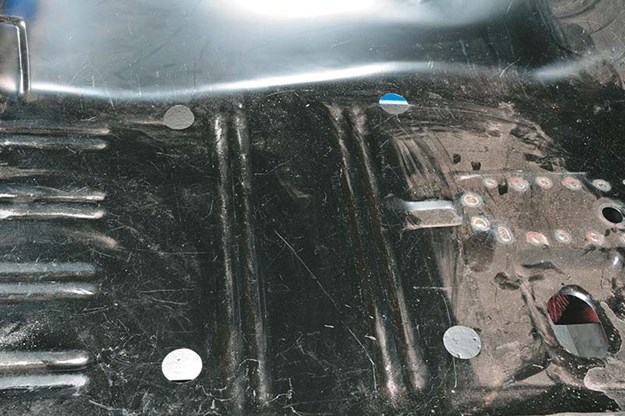
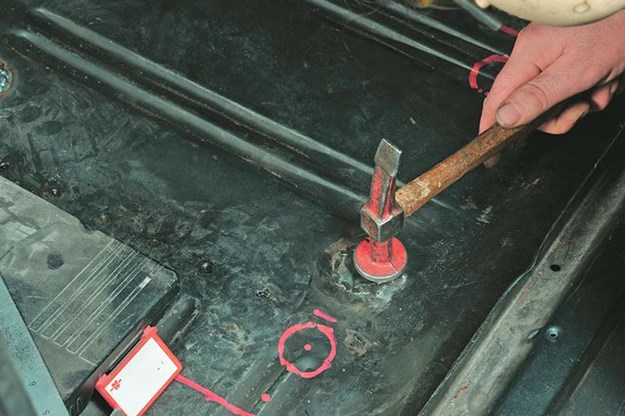
4. Four holes in the floor that allow access to the seat retaining nuts. When the seat boxes are removed you’ll see them.
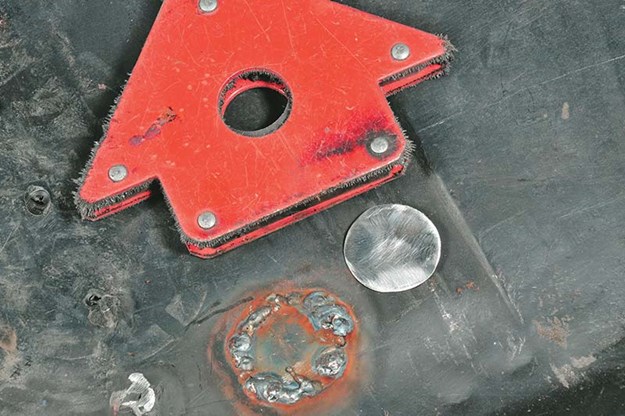
5. Access holes are filled and new ones cut. Use a welder’s magnet to hold the fitted discs in place during welding.
6. To make the fill discs invisible, grind the welds flat to unify the worked sections. A bit of paint and no one will know!
7. Discs are tack welded until the edges are completely sealed. Use a panel hammer to flatten the area across the plug.
8. The seat box is re-attached to the seat to determine the exact position into which it will have to be welded.
9. Because there are no spot welds holding the seat box in place, the rear of the seat must be supported.
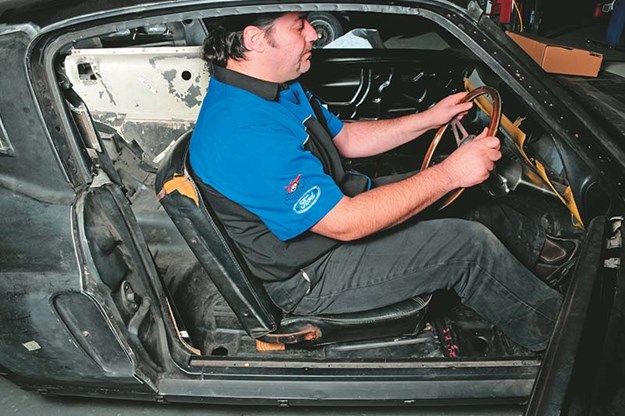
10. Clearly, the standard driving position is way too close for anyone who’s over the 180cm mark.
11. Cut away the excess metal including factory flanges. New flanges are needed so don’t cut right back to the fold line.
.jpg)
12. To fold, get two long, straight heavy pieces of steel and clamp them in a decent vice like this. You can use heavy angle iron or flat bar with flanges welded on to keep them level with each other in the vice jaws as shown here.
13. The curved side of the transmission tunnel will prevent the seat box from dropping into the lower position. The corners between the flanges will need some detail bending that can’t be done in the straight edges.
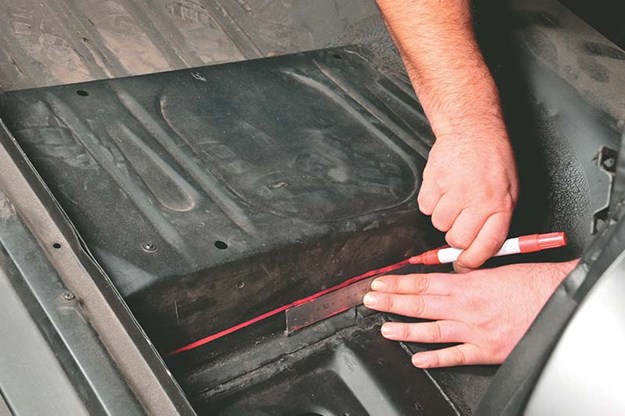
14. The first pink line 25mm back from the original spot weld line represents the centres of the original front access holes. The next pink line back is the position of the new weld line. Access holes will be about 25mm back from that.
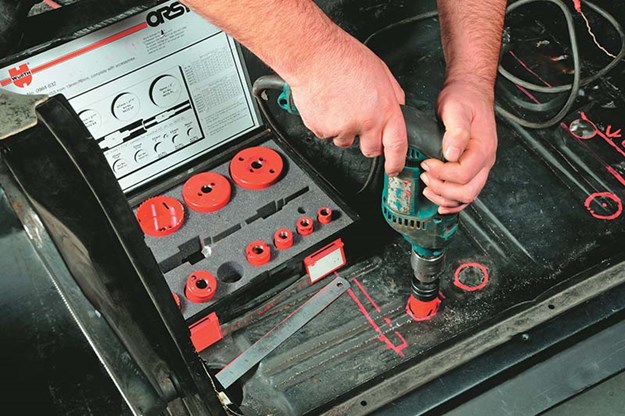
15. Create the new holes with a hole saw. Just get the size you need which in this case is 35mm.
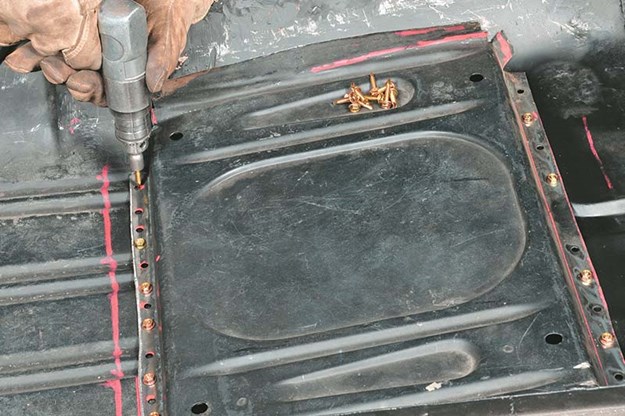
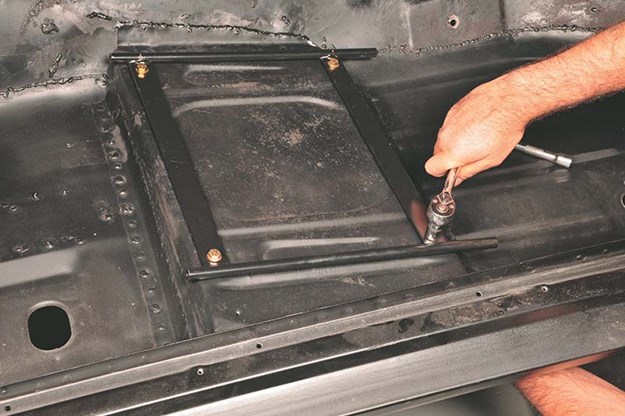
16. Drill holes along the new flanges about 37mm apart. Then fit Tek screws through the flanges between the holes you drilled to firmly clamp the seat box to the floor pan, tunnel and sill.
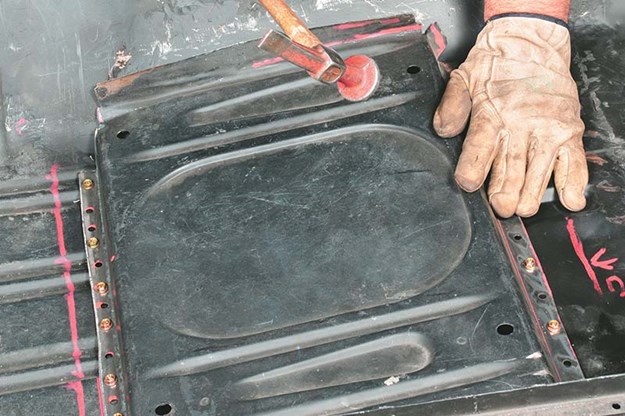
17. You’ll probably have to do a bit of panel beating to get the flanges to sit snugly against the surrounding metal. A good fit is essential to make the work look as OE as possible – to a casual observer anyway.
18. Make ’puddle’ welds through the drilled holes onto the floor pan, tunnel and sills.
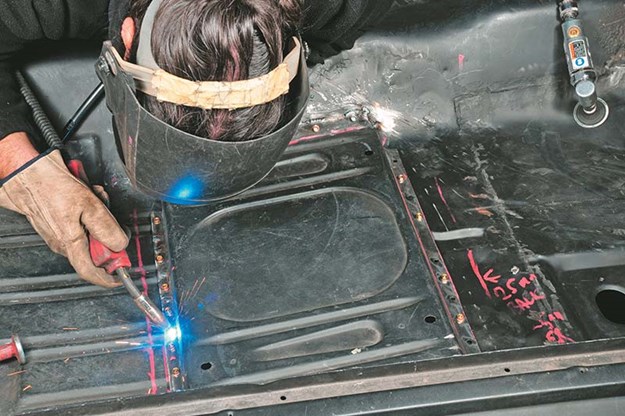
19. Remove the Tek screws and weld around the edges of the holes in the seat box and floorpan, tunnel and sills. Then fully weld fill the holes. This is what you’ll end up with.
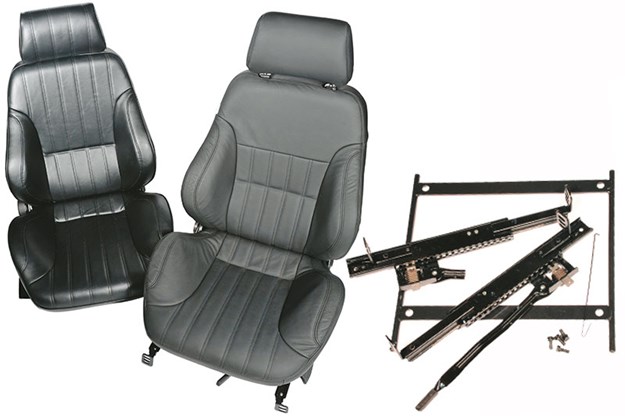
20. Adaptors are available to fit Procar seats to most cars. There’s a wide range of Procar seats available.
21. Attaching the rails to the seat couldn’t be easier. The bolt holes simply line up and you screw the bolts into place.
22. Mount the adaptor to the modified seat box as shown, using the supplied bolts. Seal the access holes with rubber grommets after doing so.
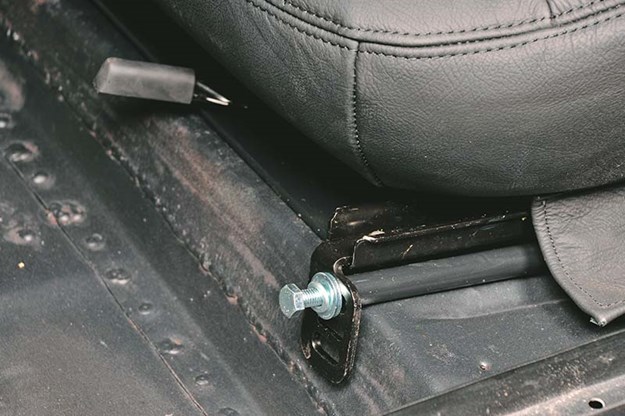
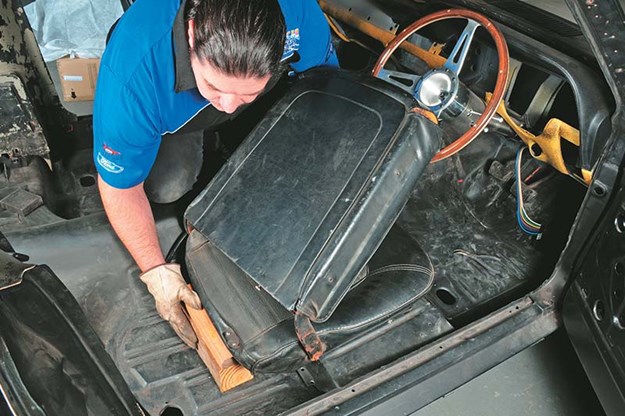
23. Fit the seats onto the adaptors and fix them in place as shown. Use the highest slots on the rails to keep the seats as low as possible. After all, that was the whole point of the exercise!
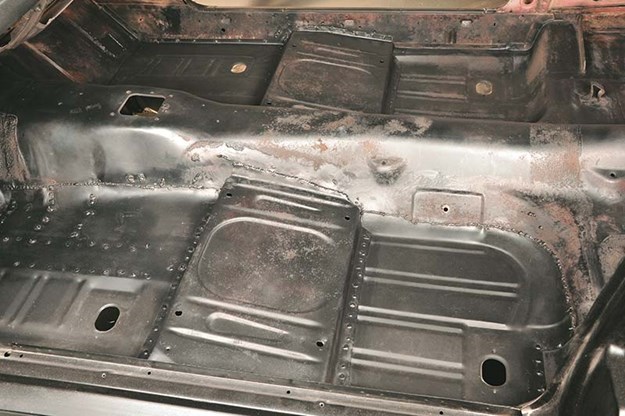
24. With the seats fitted and checked, they can be removed so that the body can be finished and prepped.
| Read next: 1976 BMW 633i interior retrim
Unique Cars magazine Value Guides
Sell your car for free right here
.jpg)
Get your monthly fix of news, reviews and stories on the greatest cars and minds in the automotive world.
Subscribe