How to pull down an engine


|
|
The lowdown on pulling apart an engine...
From Unique Cars issue #300, Jun/Jul 2009
Pulling down an engine
There’s nothing like pulling the string on a freshly built engine as it comes to life for the first time on a dyno, or perhaps in a car. (We advise getting new engines run in on dynamometers by experienced operators.) But the starting point of a new engine is considerably less glorious than the end result if you begin with an old engine from a wreckers, or one that came out of an old car. Stripping is required and as the shots show, it can be dirty work. Still, someone has to do it so it might as well be you. You won’t save much money because it doesn’t take that long to do, but it’s an excellent first step in learning about your engine. Here, Mike’s Dyno Tuning in Dandenong (Vic) shows how you might go about getting an engine apart for the first time.
STEP-BY-STEP
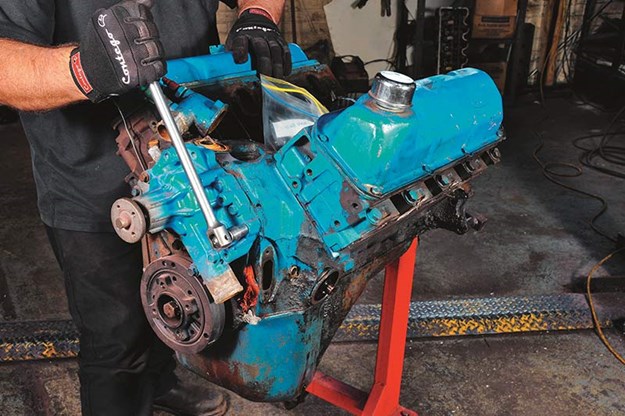
STEP 1. The first thing to do is get the oil out. It’s amazing how many people start stripping an engine before doing this. This is a Ford Cleveland and the manifold is already off it.
STEP 2. This 308 had already been half-stripped – rather badly as it happens. Instead of having tools cluttering up the area around your feet, put everything you’re using in a carry-all. It makes both working and packing up much easier. Manifold bolts in the 308 sometimes break. You’ll still be able to get the manifold off but getting broken bolts out of the block will require a screw extractor.
STEP 3. The valve gear on the 308 was already loose so we were able to simply spin it off with a speed brace. These are excellent but if you have compressed air, a nut runner is brilliant for stripping, as is an impact wrench.
STEP 4. Although the rockers on the Cleveland are different to the 308’s, it’s all the same principle. Buy a couple of boxes of resealable sandwich bags and put the bolts and components from each sections of the engine in them separately.
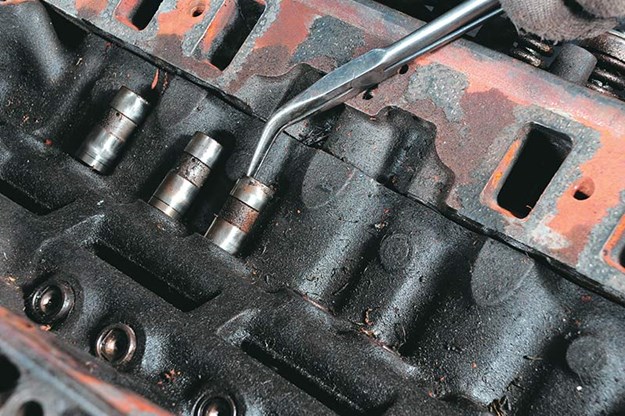
STEP 5. Remove the lifters by gripping the upper edges with pliers like this. They should come out freely. Sometimes they can get stuck in the bores because they’re damaged or there’s a build up of varnish around the bottom of them. If any are stuck, just leave them until you have the crankshaft out and you can get at them from underneath. You can also use external circlip pliers to get them out.
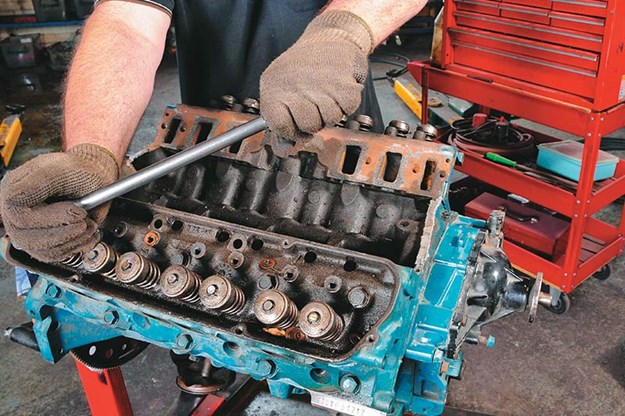
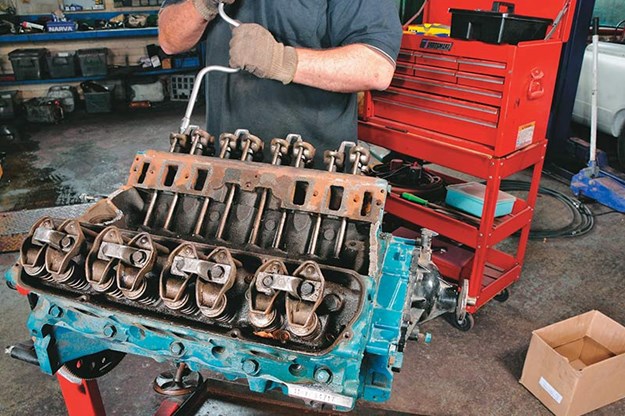
STEP 6. With all the valvegear removed you can start undoing the head bolts. Although a full range of air tools was available, we stuck with manual techniques for those without air. A long extension bar like this makes it much easier to undo really tight bolts, like head bolts.
STEP 7. Never use a screwdriver as a lever. Use a proper prybar like the one shown here. Some heads will just lift straight off without trouble but some can be very tight. Leave one head bolt in place with just a few threads engaged when loosening the head. That way, it can’t suddenly come loose and fall off.
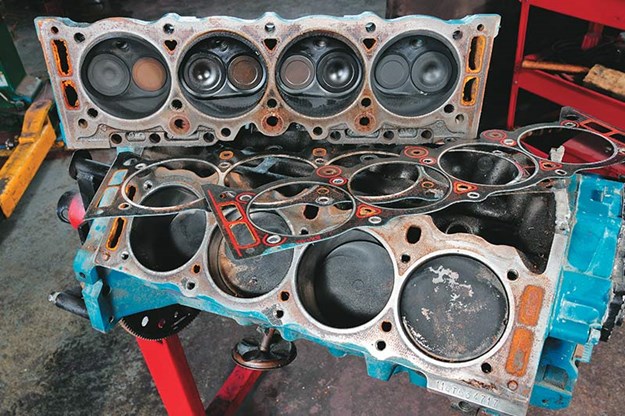
STEP 8. When the heads come off you can check for obvious damage to both sides of each gasket, to the bolt-up faces of the heads, and to the block. If you’re just re-ringing the engine, you might be able to get away with just having the face of the heads machined. If it’s a complete rebuild, the block will be decked too.
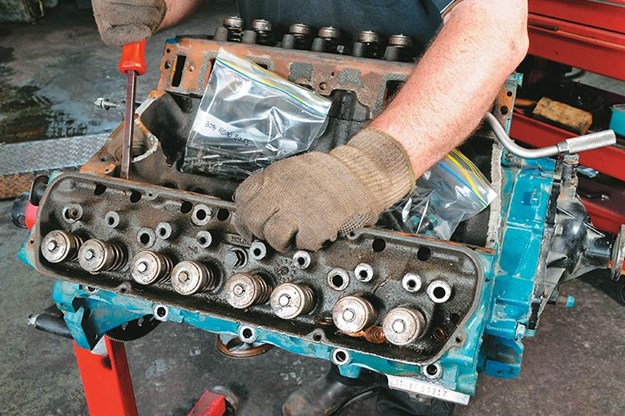
STEP 9. The cam had already been removed from the 308 but not the Cleveland. However, the coolant (never just water) pump is pretty easy to get off most engines. Again, keep all the bolts in bags as shown.
STEP 10. If the sump is stuck fast, don’t try to lever it off in one place. You’ll damage the gasket surface and have problems getting it to seal properly during re-assembly. Try to cut the gasket or silicon free with a knife slipped in between the block and sump. If you still have to lever it off, do it evenly and gradually right around the entire edge of the sump to avoid localised damage.
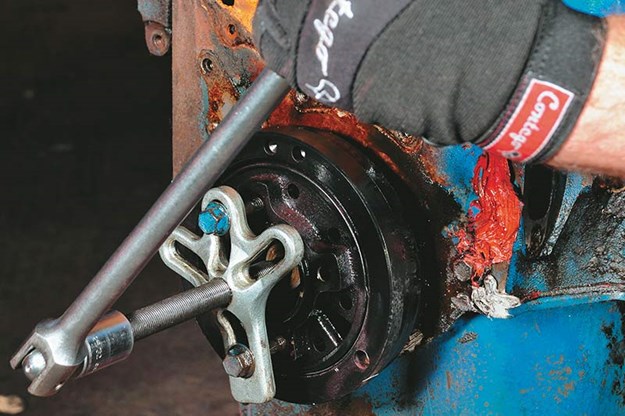
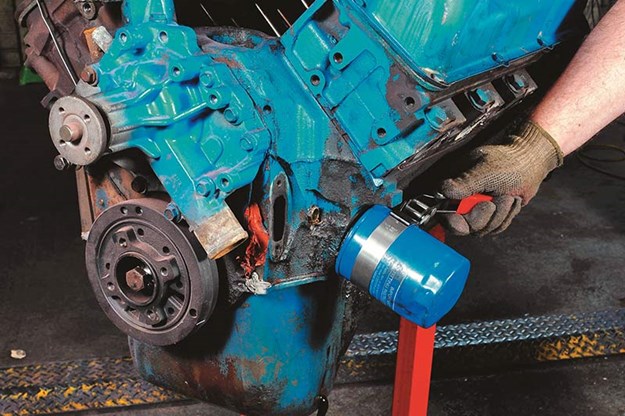
STEP 11. One of the special tools you will need is a harmonic balancer puller. There are inexpensive versions available and, although a trained mechanic wouldn’t use one, they work extremely well for occasional use. Make sure that the large retaining bolt has been removed before trying to remove the balancer. Mind you, some engines don’t have retaining bolts.
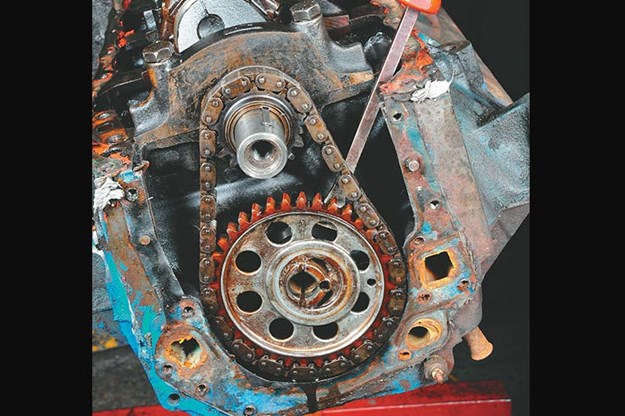
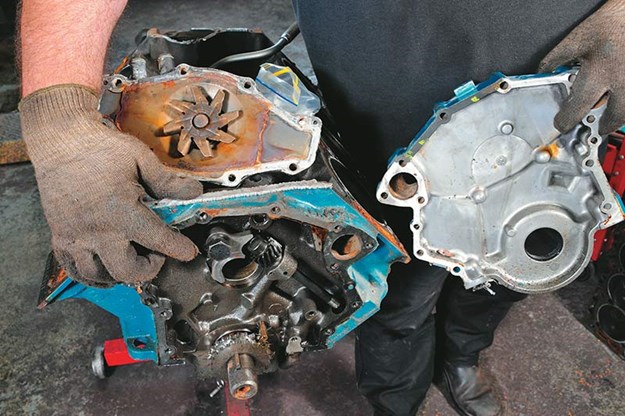
STEP 12. When the timing cover and other components are off the front of the engine the timing chain will be exposed. Remove the retaining bolt for the cam sprocket/fuel pump lobe and lever the sprocket off with your prybar.
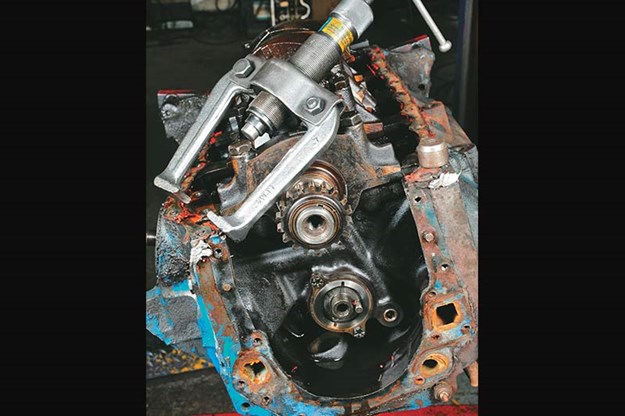
STEP 13. On the Cleveland, the crank sprocket slips straight off after you’ve ‘wiggled’ the pressed oil slinger off. Keep the slinger, they’re hard to get. So are the Woodruff keys. A puller will have to be used for some engines for the crank sprocket and perhaps the cam sprocket, too.
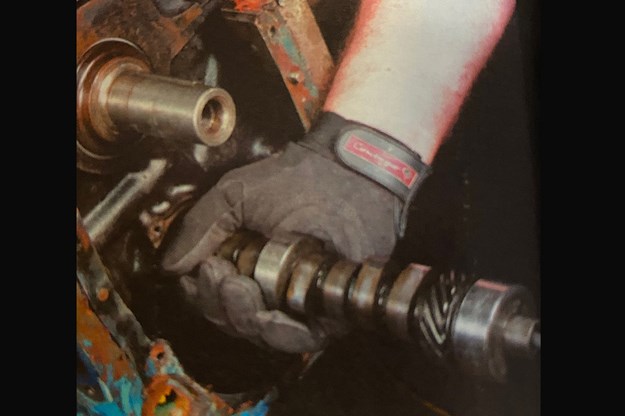
STEP 14. Undo whatever mechanism is used to retain the cam in the block and carefully slip the camshaft out. Slip a long bolt in the hole in the end of the camshaft to give you leverage and better control. Be careful not to damage the cam bearings if you’re going to re-use them.
STEP 15. The cam in a 308 is retained by the shaped block being pointed at. Keep it. Here it was re-attached to the block after the cam was first removed. Note that you should never try to extract cam bearings from the block yourself. If you don’t have the correct tool you’ll damage the bearing mounting surfaces.
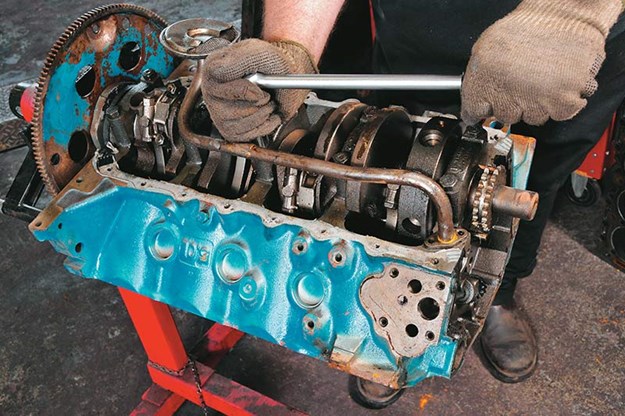
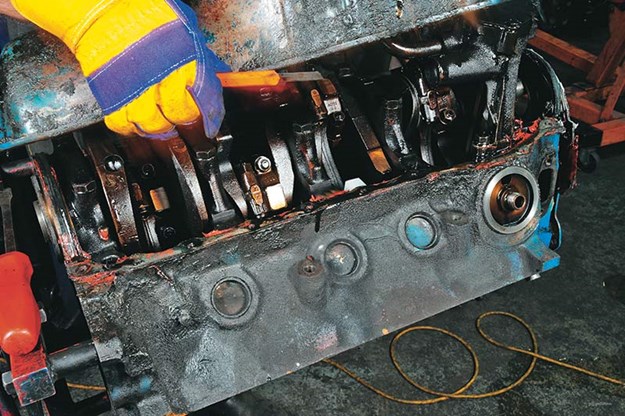
STEP 16. Undo and remove the oil pickup. These are often quite clogged with all sorts of gunk including silicon in engines that have been rebuilt since leaving the factory. If the main bearing caps on your engine aren’t numbered from the factory (Chevs aren’t) then make sure you number them with tie-on labels or some other method.
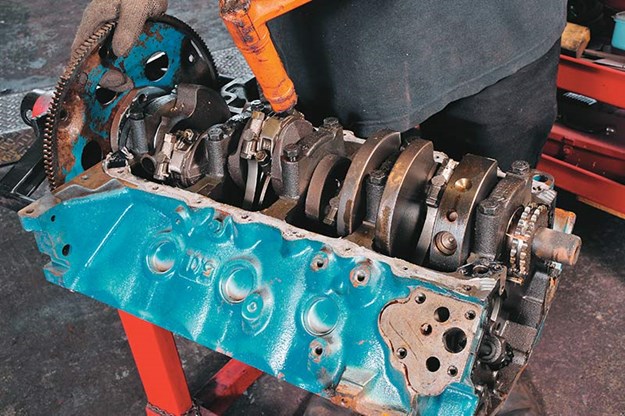
STEP 17. Undo the conrod nuts a few turns each. Then, using either a rubber or plastic mallet (we’re using a damaged piston insertion mallet here), give each of the bolts a firm tap at the bottom (which is facing upwards) and this should separate the caps. If the bolt moves in the rod rather than separating the rod and cap, as seen here, you know you have bolt problems and you’ll definitely need new bolts.
.jpg)
STEP 18. When the caps have been separated as described in the previous step, remove them and push the pistons out of the tops of the bores (which will be facing downwards). Keep one hand ready to catch each of them as they come out. Be very careful to avoid dragging the exposed rod bolts across the journals on the crankshaft to avoid damaging them. Also, be careful not to damage the bores by allowing the rods to hit them on the way out.
.jpg)
STEP 19. If you’re on a tight budget and you’re just going to re-ring the engine, you can test the condition of a rod/piston combination as follows. If the rod drops under its own weight when you let it go it can probably be reused.
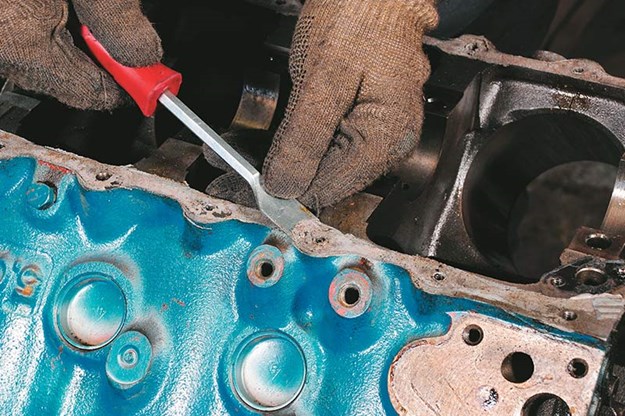
STEP 20. Your block has to be thoroughly cleaned but you can’t do it by hand. It has to be ‘hot tanked’ to achieve the desired degree of cleanliness. However, all of the gasket and silicon residue must be removed. It’s best to use a proper gasket scraping tool for this.
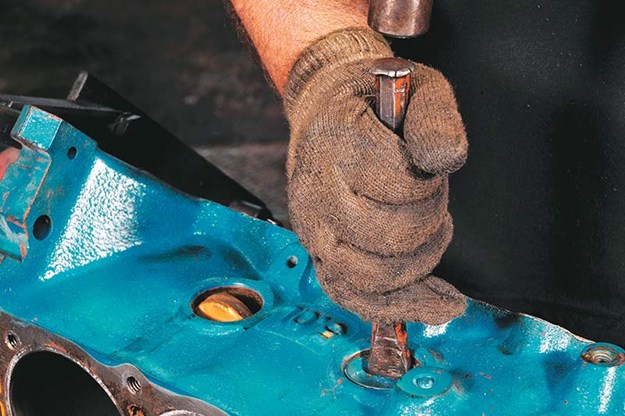
STEP 21. Welsh plugs also have to come out. The method is to knock them sideways in their seats like the one on the left and then use multigrips to grip them then lever them out through the holes.
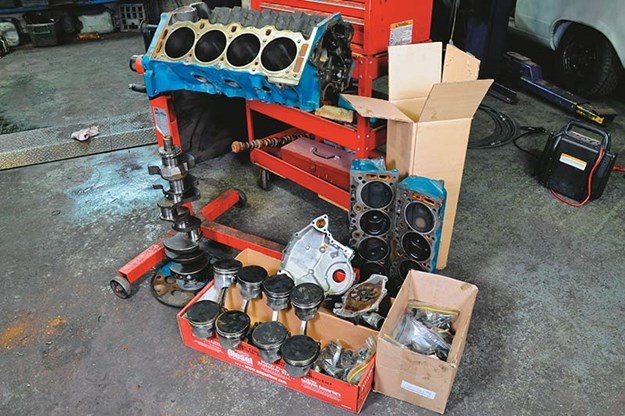
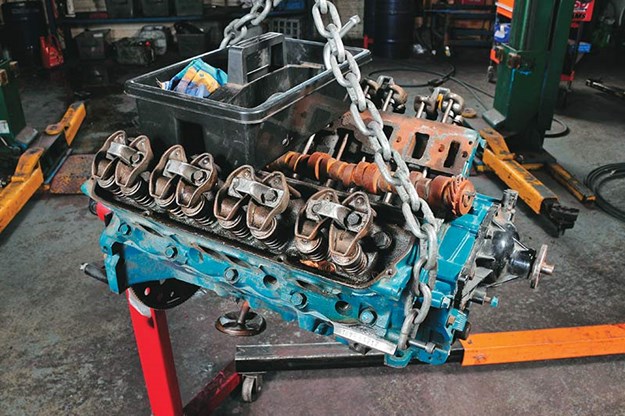
STEP 22. As we said, put all the nuts and bolts in plastic bags in relevant groups. Then put all the bags in cardboard boxes along with all the other components. When you’re finished you should have a neat little pile like this. Normally, the flywheel or flexplate will be removed from the engine before it’s fixed to the engine stand. However, if I know a crankshaft will sit around for a while, I’ll leave the flexplate attached so the crank can’t be knocked over as easily.
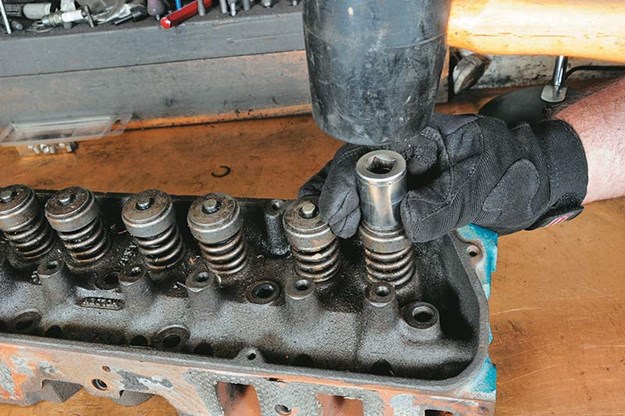
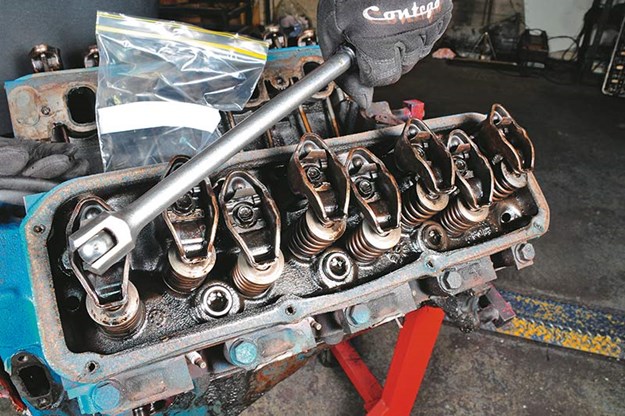
STEP 23. Valve retainers and collets under spring pressure have a very tight grip on valve stems. This has to be ‘broken’. If you hit a valve stem unevenly you’ll probably bend it. Use a socket, as shown, and give it a firm, square hit with a mallet. You know the sound when you’ve broken the grip.
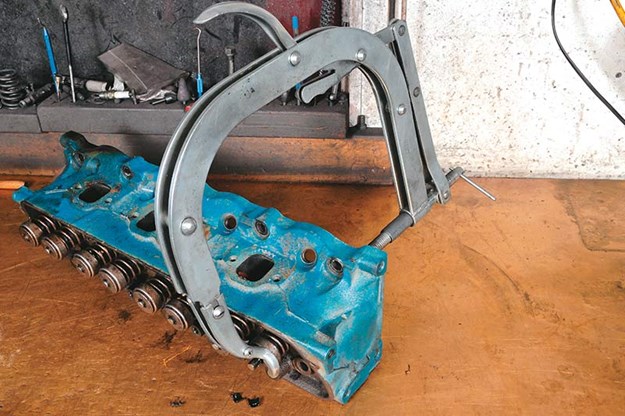
STEP 24. To disassemble the valve gear you’ll need a valve spring compressor. There really isn’t any other practical way of doing this. Manual versions like this are relatively inexpensive and while they’re not as good as pneumatic units they work quite well.

STEP 25. When you’ve completely disassembled and cleaned your engine you’ll have to take it to an engine reconditioning shop to be ‘hot tanked’. After that’s been done it will look like this and you’re ready to start building your new engine; but that’s another story.
Couple more things…
Interpreting the condition of an engine as it comes apart is a job for specialists, because some of the signs of problems are subtle. About all you’ll be able to check for are really obvious things like visually prominent cracks and bent components. It’s normal for components to show signs of wear but sometimes bad wear patterns are hard to distinguish from normal wear and tear.
Really, engines in half-decent condition come apart pretty easily. If something doesn’t want to separate it probably indicates a problem.
In this case it’s probably best to get your engine builder to deal with it.
As we said, be careful not to damage lifter bores, cylinder bores, bearing seating surfaces, threads etc. We’ll cover component replacement, machining and assembly in other articles shortly.
Thanks to Mike’s Dyno Tuning (03 9793 9113) for advice and for letting us work in the shop.
Unique Cars magazine Value Guides
Sell your car for free right here
.jpg)
Get your monthly fix of news, reviews and stories on the greatest cars and minds in the automotive world.
Subscribe