Workshop Tips: Guide to Swapping Manifolds


|
|
Breathe easier with this guide to swapping manifolds
First published in Unique Cars #294, Jan/Feb 2009
Swapping manifolds
If you’re not that experienced on the tools and you’re looking for a fairly simple job, then swapping manifolds is just the thing. It’s easy, usually quick, doesn’t require much in the way of specialized tools and can offer considerable performance benefits.
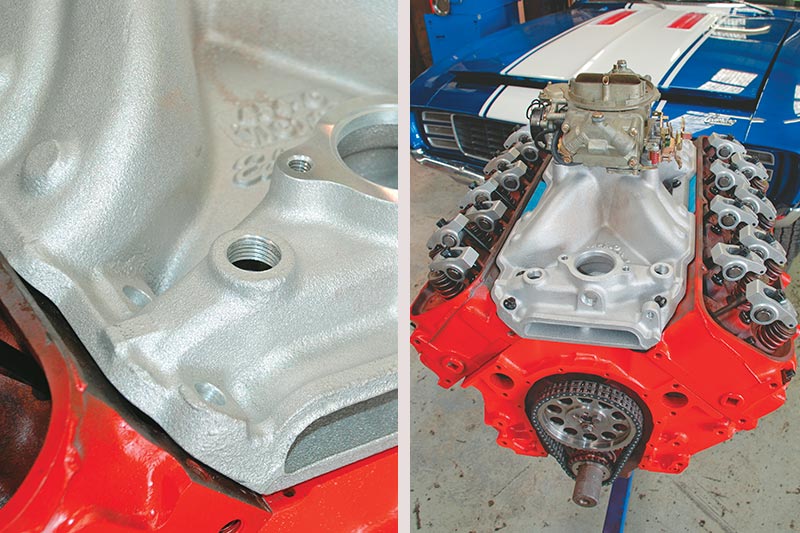
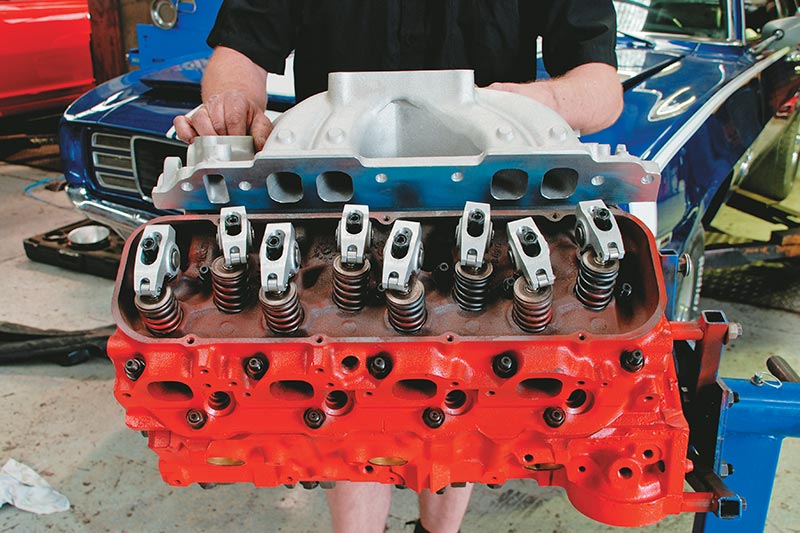
Some unique cars were designed for performance right from the outset and feature pretty good breathing from the factory, particularly models from Europe. However, just about all muscle cars have restrictive inlet and outlet tracts that can be improved considerably by adding aftermarket parts like the high-rise single plain manifold being fitted to the big-block Chev shown in the sequence below.
Chris Dalton from Dalton Automotive in Geelong was in the middle of the job when we walked in so he let us watch and provided the pointers that follow. Keep in mind, though, that a single-plain manifold like this may not be the best choice for a standard engine. For a manifold like this to work properly the engine would likely have larger inlet ports and valves, a bigger cam and also rev faster than stock. If your engine is closer to standard, a dual-plain manifold may work better.
The big-block Chev shown has had a bit of work done so it will be able to use the flow supplied by the larger runners and plenum featured here.
Regardless of the type of engine or application, the basics of a manifold swap on a mild engine are the same. Even an all-out performance engine is similar except that the manifold outlets must be perfectly matched to the port entries on the heads. So let’s take a look at what’s involved in this extremely easy job....
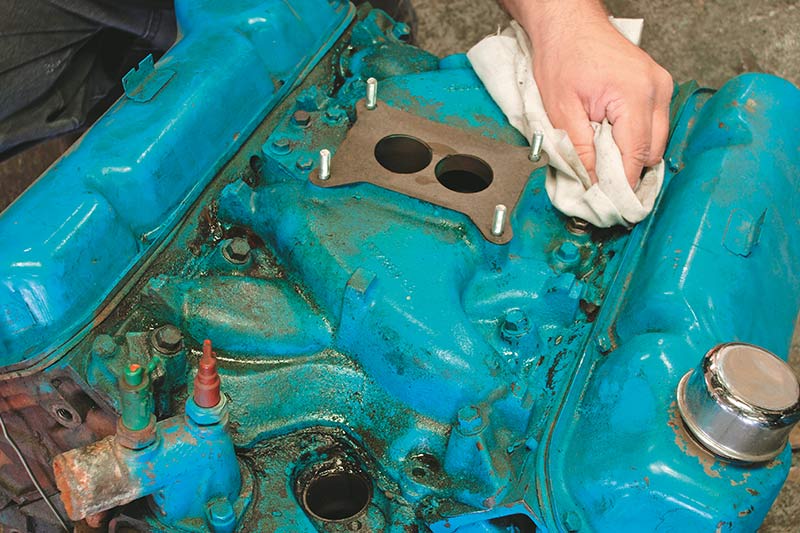
1. The Chev manifold had already been removed by the time we arrived at Dalton Automotive. Therefore, to show you how to remove an original equipment manifold, we went and found this Ford Cleveland. The first step is to blow off any loose debris sitting on the engine and then clean the manifold thoroughly. Carby cleaner works well for this.
2. All these shots are on engines that are out of the car. If you’re doing this while your engine is still in the car, disconnect all hoses, lines, cables, linkages, wires and whatever is needed to remove your carburettor, manifold and distributor (if necessary). Label everything you disconnect with masking tape. It’s not a bad idea to get a digital shot of the original installation from all angles before you start. You may need an extension bar or breaker bar with your socket if the bolts are tight. Try Penetrine if they’re really stuck.
3. You may be tempted to use a screwdriver to prise the manifold free but if there are any mechanics watching, they’ll freak. Instead, use a prybar. There are relatively inexpensive sets available and it’s always better to use the right tool for the job. As with bolts, manifolds can be stuck fast, quite loose, or anywhere in between. This one looked like it was going to give trouble but it came off with virtually no effort at all.
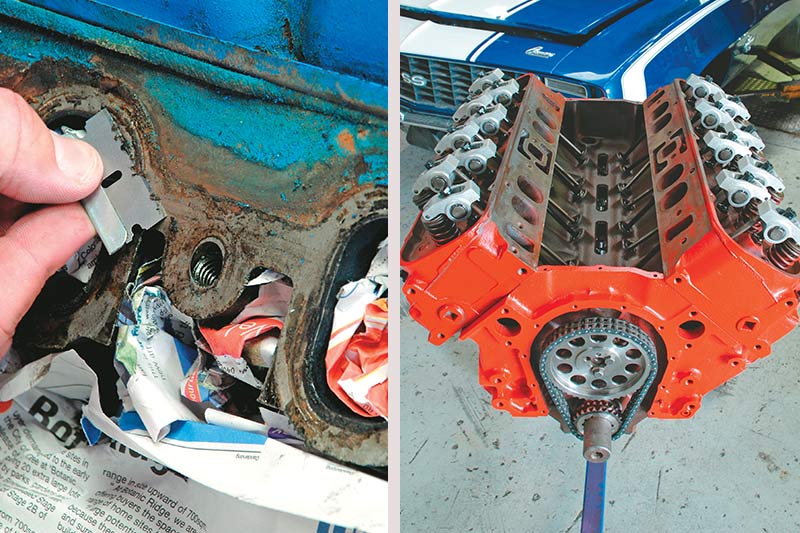
4.When you’ve lifted the original manifold off the engine you need to make sure nothing can fall into the ports or exposed valley area. Line the valley with newspaper and push wads of newspaper into the ports. However, before pushing the paper into the ports, make sure any gasket residue or silicon overhanging the ports is removed so that you don’t push it in along with the paper. Scrape off all gasket and silicone residue until everything is clean. Scrape away from the ports and don’t just let the material fall into the paper in the valley – remove it before it falls. When you’ve finished and the paper is removed it should look pretty much like the big-block.
5. Try your new manifold on for fit. Sit it in the valley and see how things line up. If your engine is stock and your manifold is new it should just drop into place without too much trouble. Engines that have had work done to them and second-hand manifolds, or both, can be a bit different. In this case the upper edge of the manifold gasket face wouldn’t clear the lip along the upper inside edge of heads. This prevented the manifold from dropping into place properly.
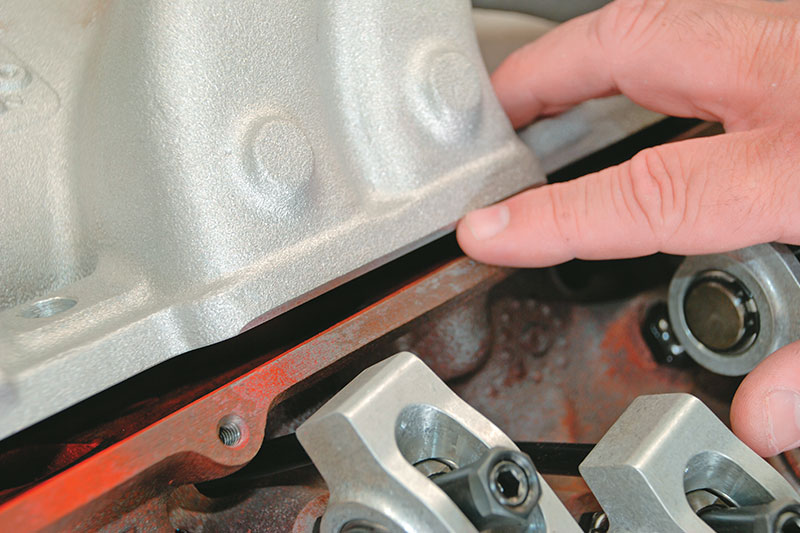
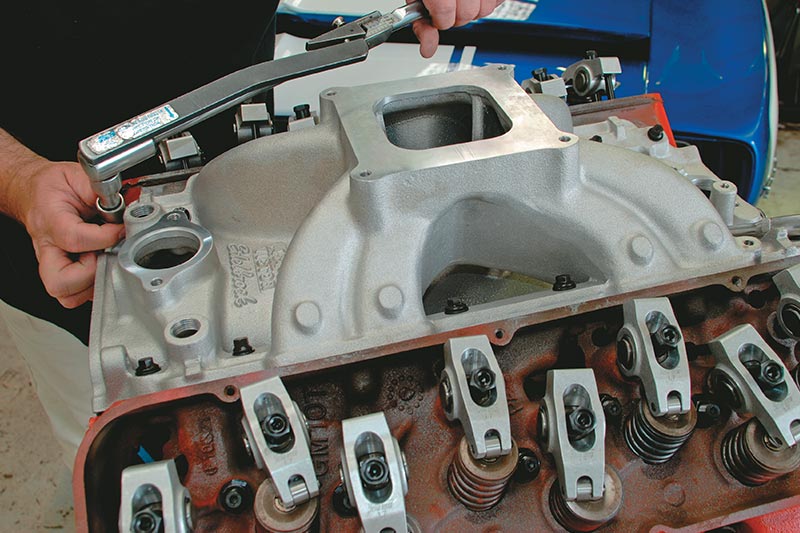
6. Often, a manifold that won’t fit has to be sent to a machinist for rectification. And, in fact, you may have to take your whole engine to him along with your manifold so that he can determine exactly what the problem is. In this case, however, some judicious work with the die-grinder along the upper edges of the gasket faces of the manifold allowed Chris to rectify the clearance problem. After this, the manifold sat perfectly.
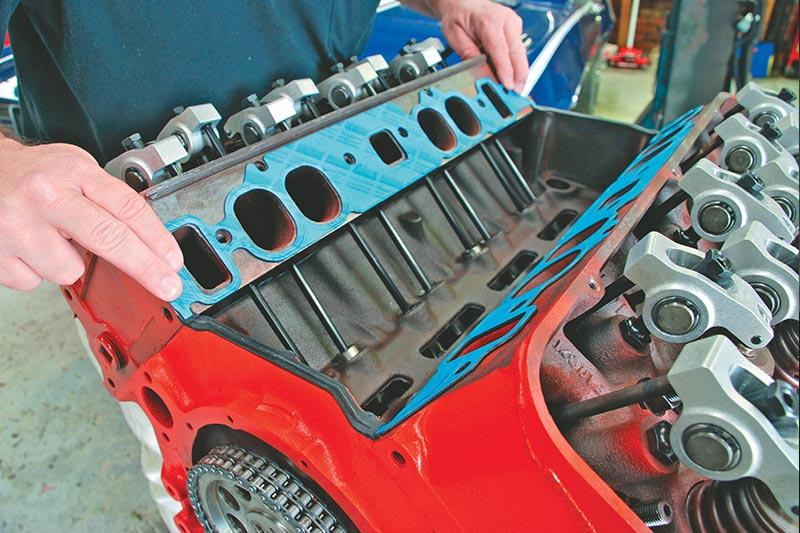
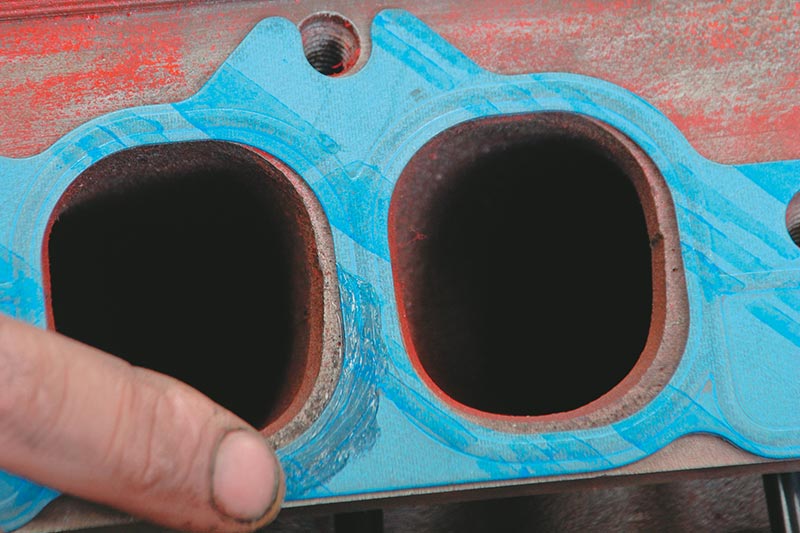
7. The next thing to check is that the outlets from the manifold runners line up with the entries to the inlet ports in the heads. You’ll use the gaskets as templates for this. Set them in place as shown. In the case of this engine, the black rubber seals across both ends of the valley have locating nodules moulded onto their underside. This ensures that they locate perfectly. The upper sides of the rubber seals have gasket locating rebates at each end. Set the gaskets in place using them but also make sure the bolt holes line up.
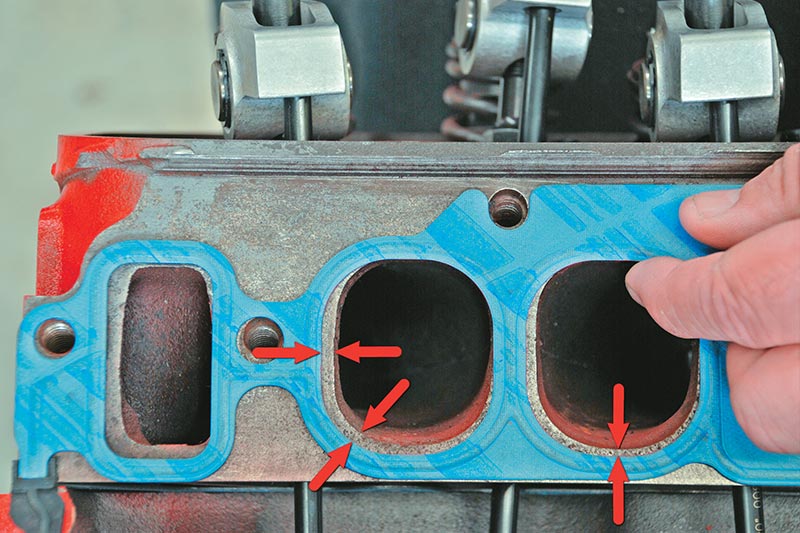
8. You can see here how accurately the gasket is placed in relation to the bolt holes in the head. You can also see that the edges of the ports don’t line up with the edges of the holes in the gasket at all points. At the top of these two ports the gasket actually overhangs the port a little. If this is the case, you can trim the gasket back flush with the edge of the port. Then, wherever the gasket is bigger than the port (the arrows provide examples) you have to measure the distance between the edge of the port and the edge of the gasket and make a careful note of it.
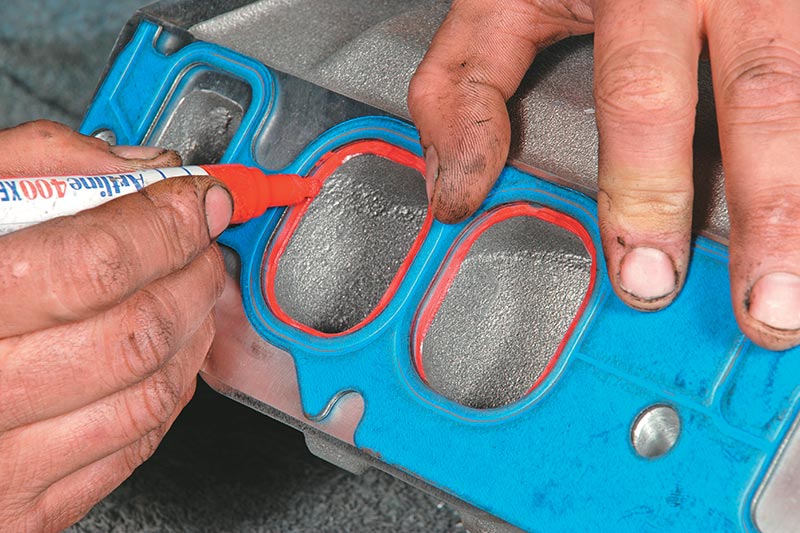
9. Transfer the gasket to the corresponding side of the manifold making sure that the bolt holes line up exactly. Mark the manifold as shown with a paint pen. Now, transfer the measurements you made in the previous step to the corresponding manifold outlets. So, if the distance from an edge of a port opening to the gasket opening was two millimetres on the head, then measure two millimetres from the gasket edge on the manifold and place a mark in the paint. Do this for each side of each port in each of the heads.
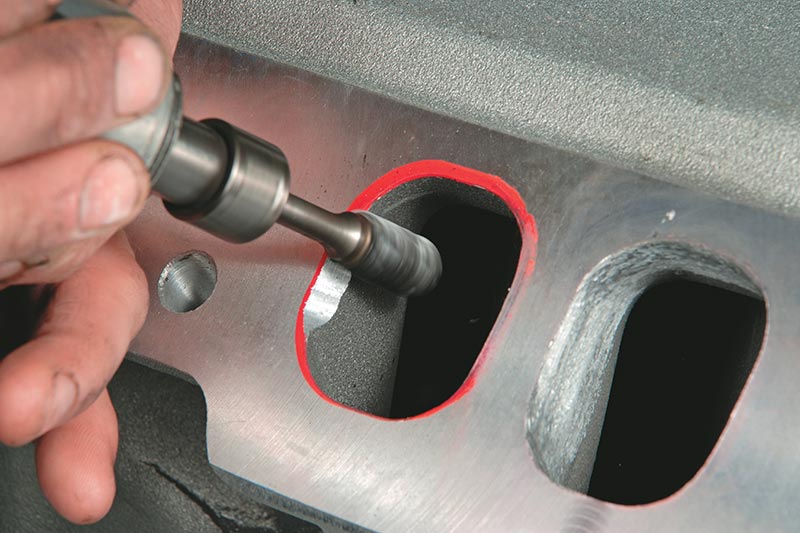
10. The marks you made in the paint on the manifold correspond with the sizes and positions of the inlet ports in the heads. These marks indicate how much material to remove from the manifold outlets so that they’ll match the inlet ports. Don’t go past the marks. In fact, it’s better to make the manifold outlets just a little smaller than the inlet ports. This ensures that mixture passing into the engine won’t hit any of the edges of the inlet ports and disrupt flow.
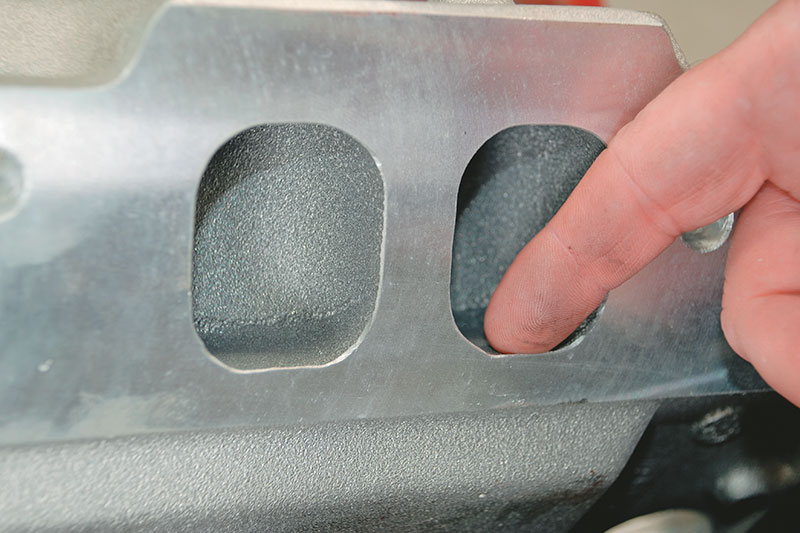
11. Although we’ve just described how to match the manifold outlets to the inlet ports in the heads, there’s a good chance you won’t really have to do it. The fact is that aftermarket manifolds all have runner outlets that are smaller than standard inlet ports. This is so that any blunt, stepped changes in cross section will face into the port and won’t impede inlet flow. If you do decide to fit the manifold without the matching procedure we’ve just described, it’s a good idea to just remove any sharp lips that protrude into the inlet flow path. You don’t even need a die grinder for this, a file will do.
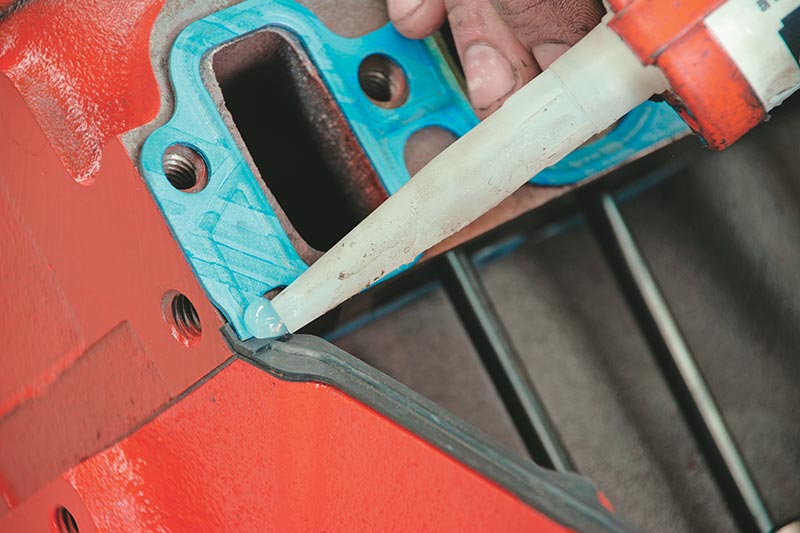
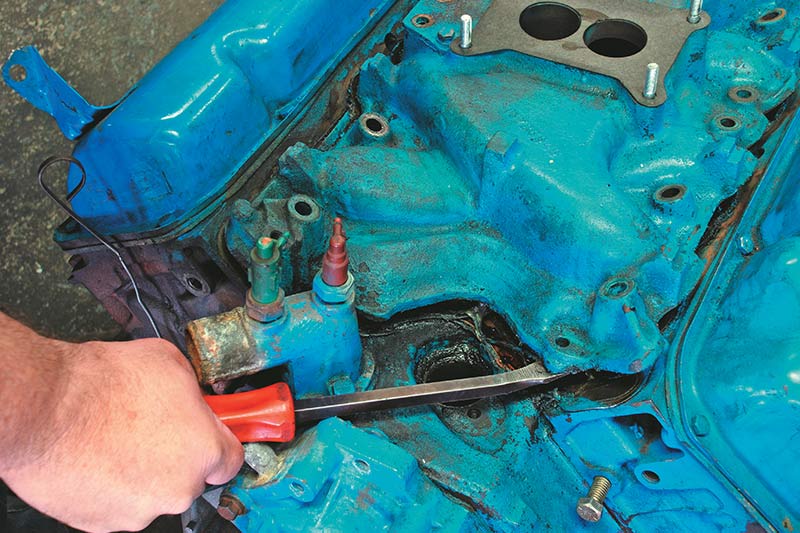
12. Some aftermarket head/engine combinations don’t seal that well at the ends. Many combinations have particular problems at the point where Chris is applying a dab of silicon. The point is that all gaps at either end of the valley have to be filled with silicon. There can be no leaks.
13. It’s also useful to apply a very light smear of silicon around each of the port holes on both sides of each gasket. We stress, however, that the amount of silicon used must be very small. It really is just a light smear as shown. Aside from improving seal, this will also help keep the gaskets in position against the heads as you fit the manifold, which is the next step.
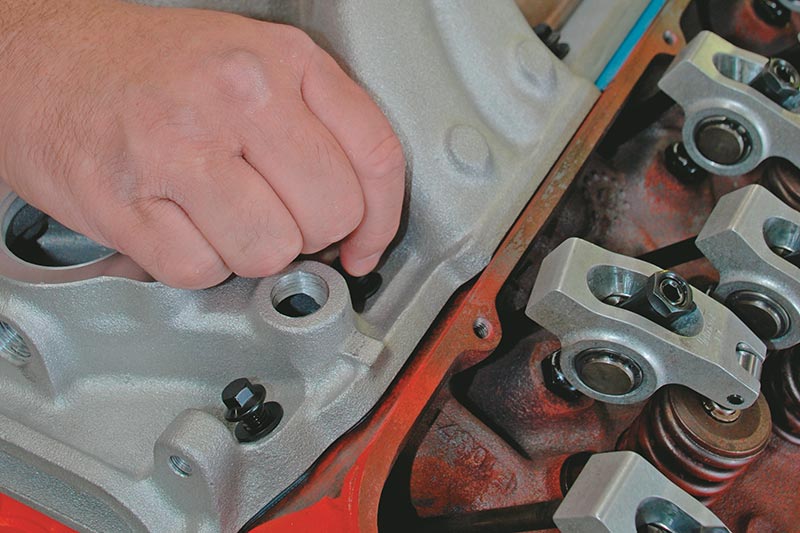
14. Clean the manifold and blow it out thoroughly before fitting it. Then carefully lower it into position without dislodging the gaskets. When it’s in place, look down each of the bolt holes to check that the gaskets haven’t moved and that everything still lines up properly. If you can see down the inlet runners, check alignment there as well.
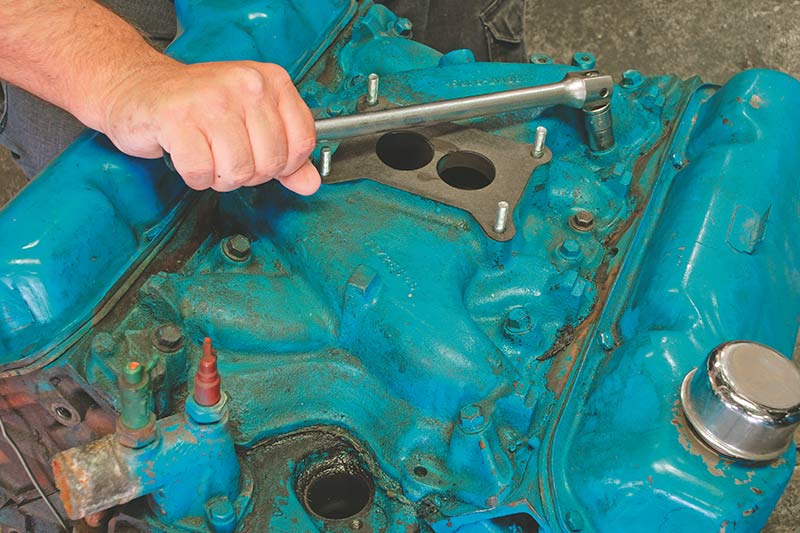
15. If everything lines up, insert the bolts in the holes and get each one started by turning it in a few threads. Chris says this is important because if you turn each one in fully, it can be difficult to start the next one. Leaving them loose until all of them are started helps maintain alignment.
16. Whatever your engine, there will be a torque specification for the manifold bolts. If your manifold manufacturer hasn’t specified tensions use the factory settings. Chris explained that the bolts should be tightened in two stages. Start in the centre of the manifold and work outwards in a spiral to the end bolts. For the first tightening step set your torque wrench (if you don’t have one, get one) to about 70 percent of the final torque required. Then, set your wrench to the specified torque and bring all the bolts up to that setting in the same outward spiral tightening pattern.
You may be wondering why Chris didn’t grind the inlet ports in the heads out to the edges of the holes in the gasket and then open the manifold runner outlets to match those. The reason is that opening the ports at this location would have required corresponding work further into the rest of the ports to match the increased flow potential of the enlarged openings. That kind of performance porting wasn’t part of this fairly simple job. On the other hand, what we’ve shown here is definitely well within the abilities of a home mechanic. Give it a try sometime.
Unique Cars magazine Value Guides
Sell your car for free right here
.jpg)
Get your monthly fix of news, reviews and stories on the greatest cars and minds in the automotive world.
Subscribe